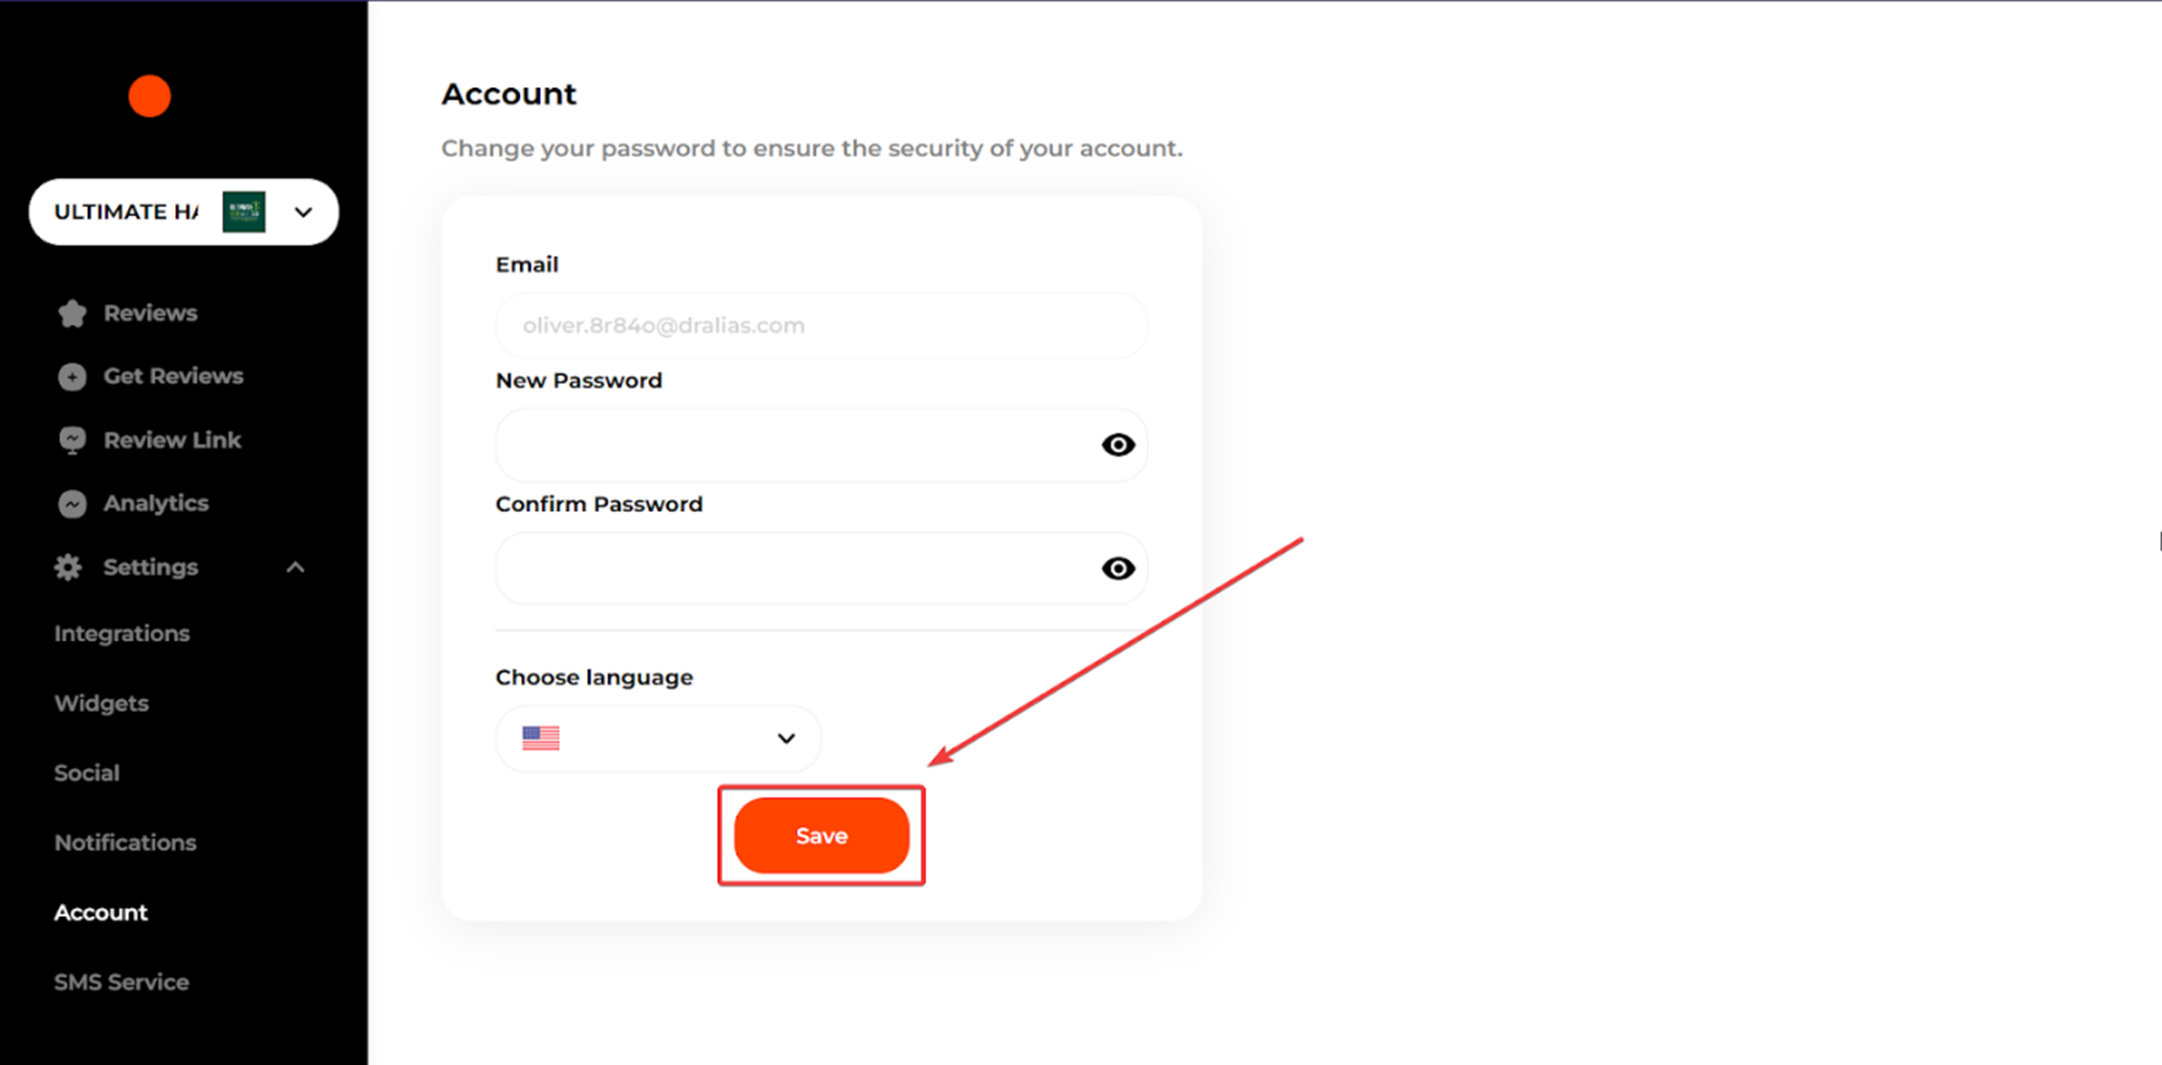
Updating Password
Changing your password helps to keep your account safe.
When you sign in using the credentials sent with the welcome email, you should change the initial password by clicking Settings on the left sidebar.
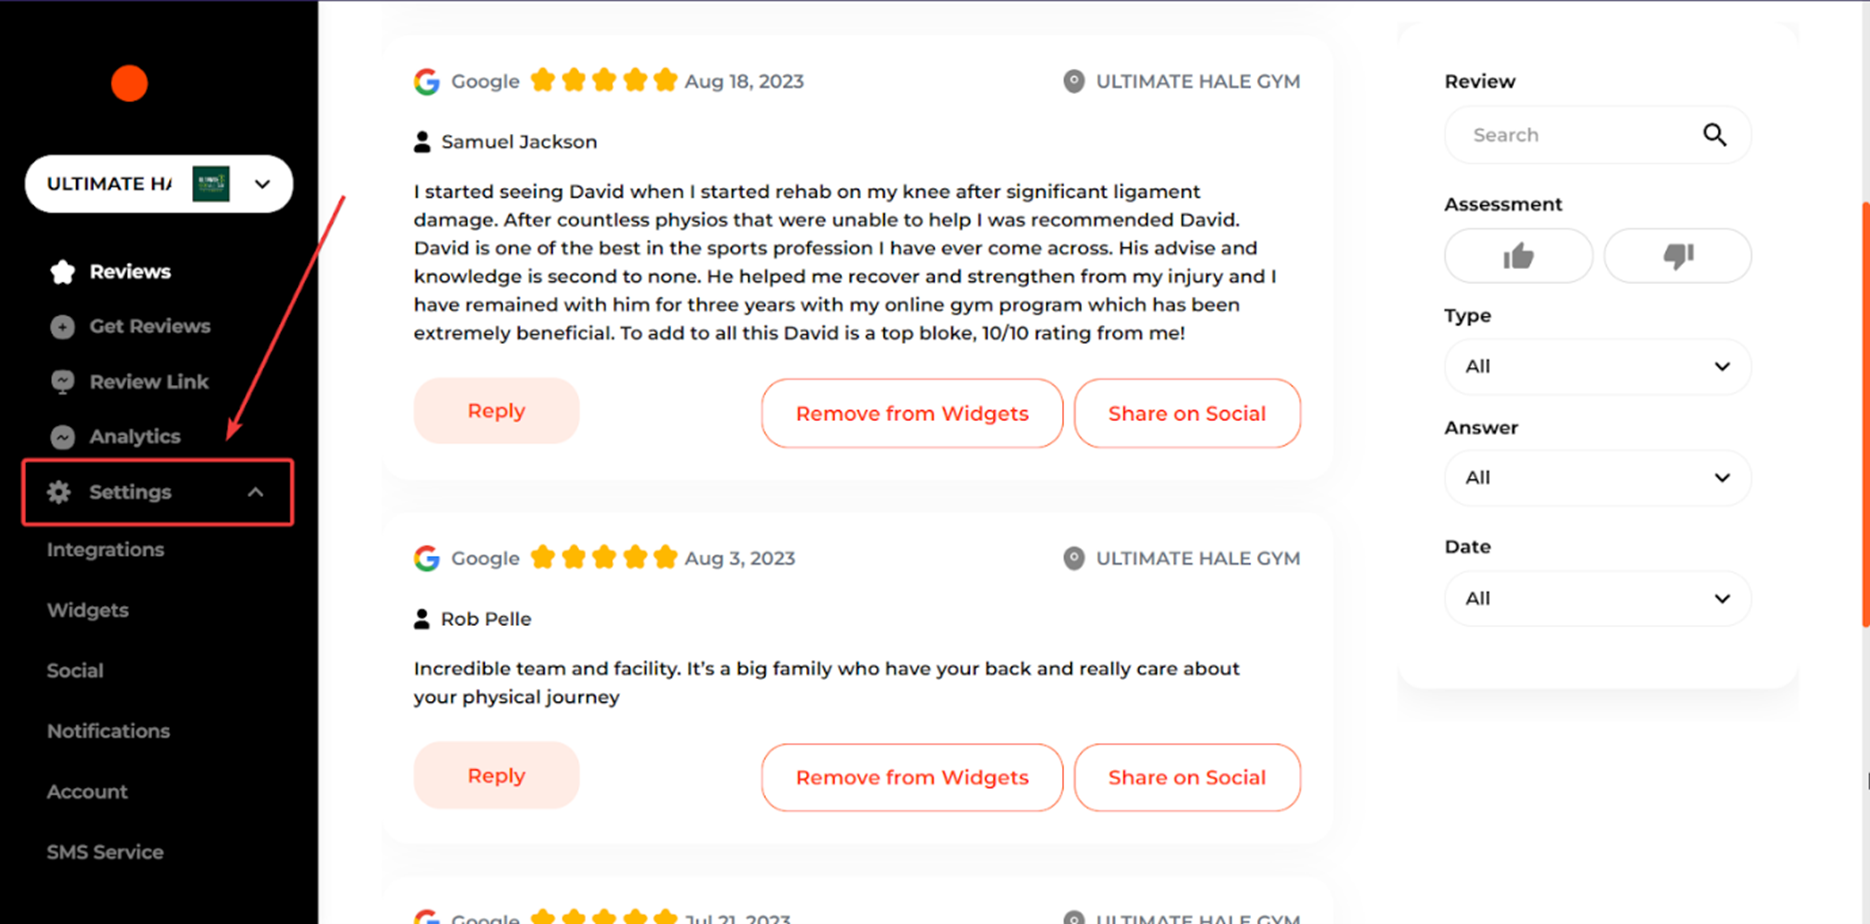
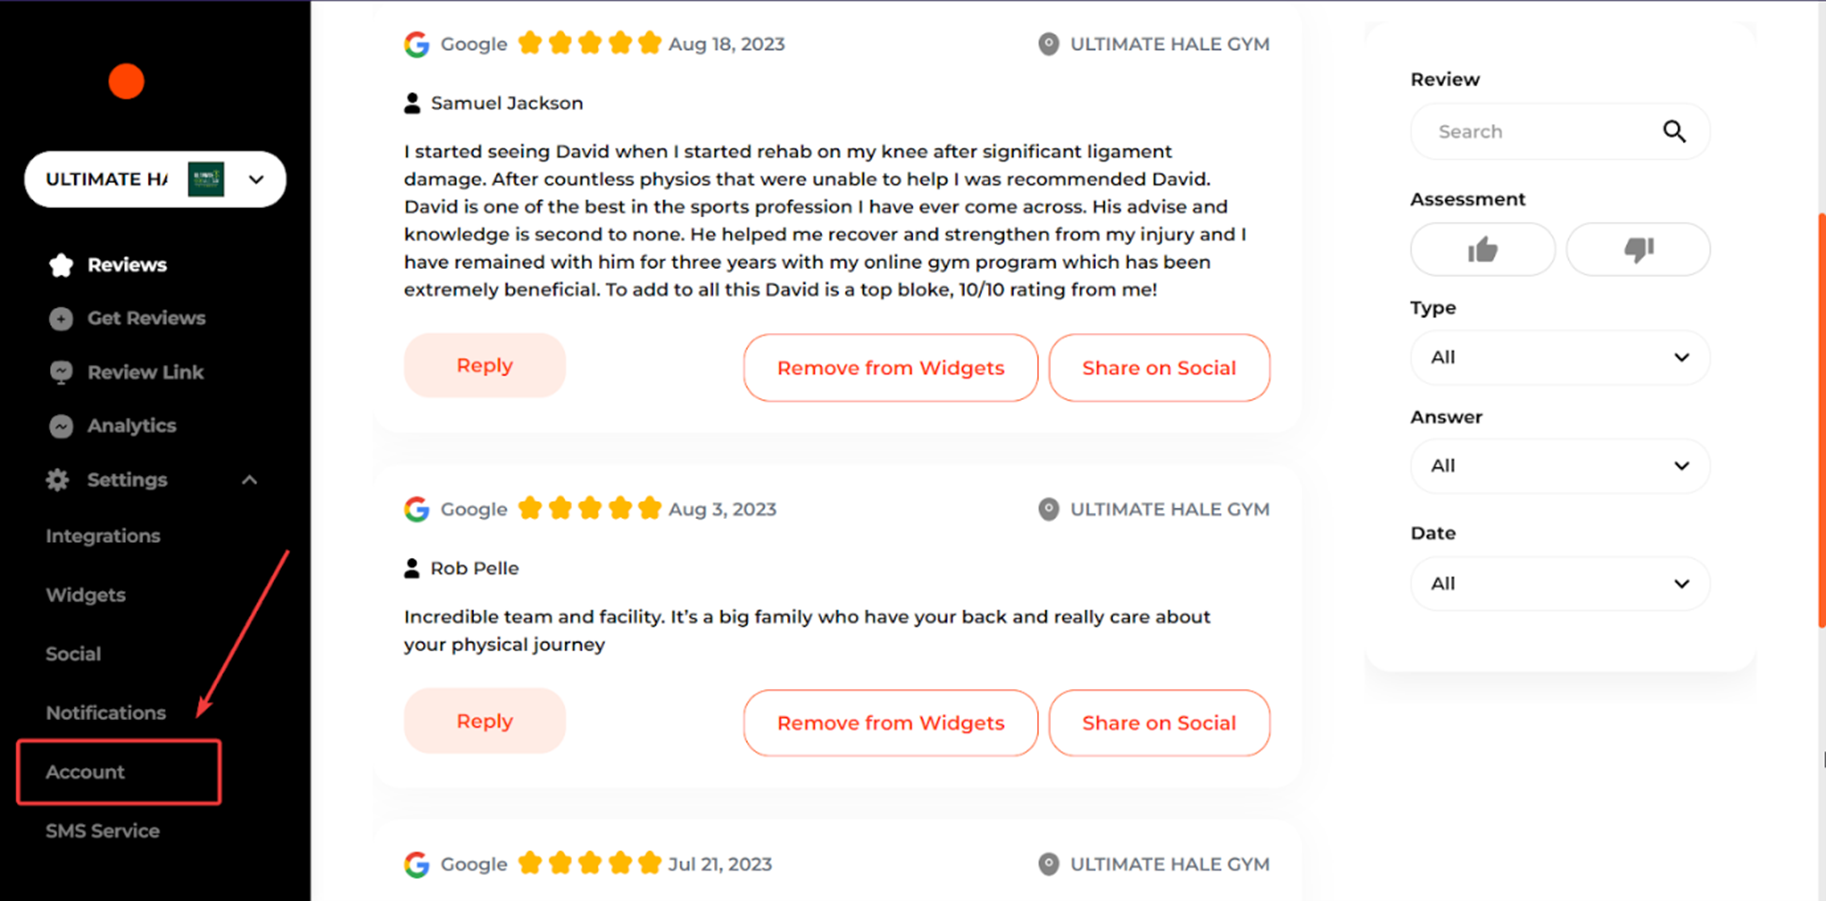
Then click Account.
You’ll be presented with the field to enter your New Password.
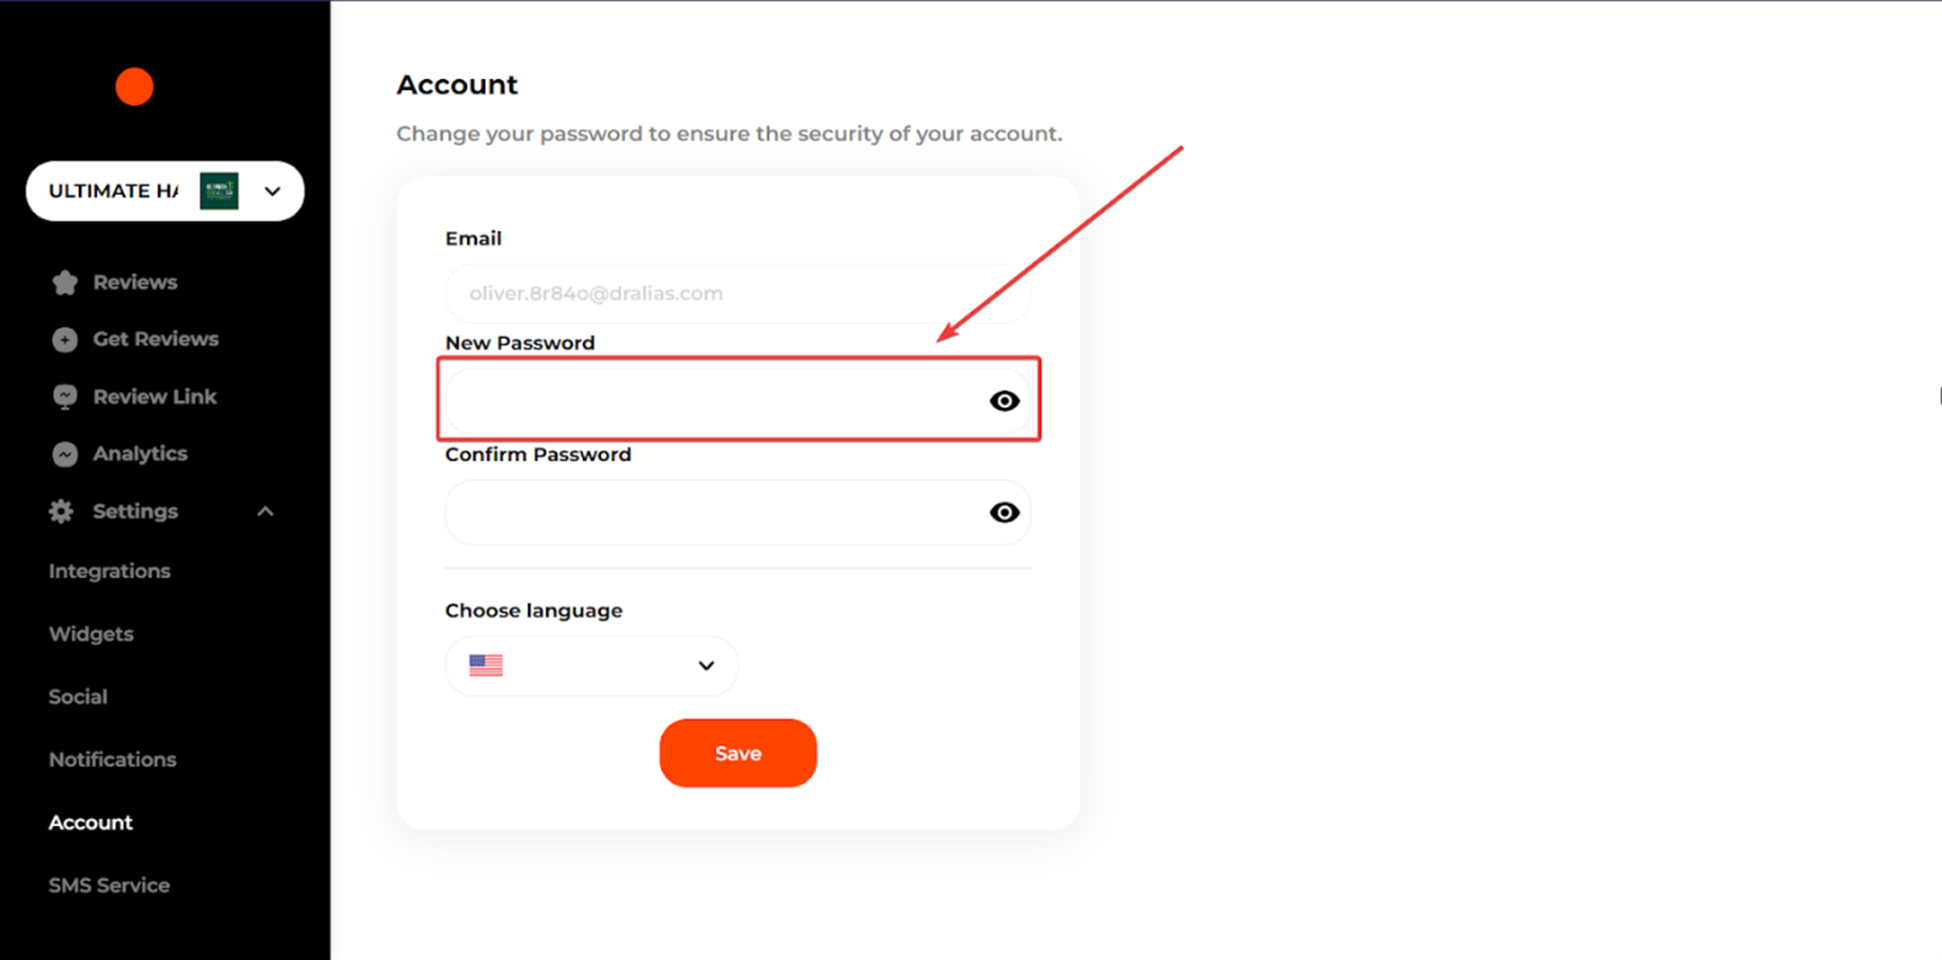
Repeat the same password in the Confirm Password field.
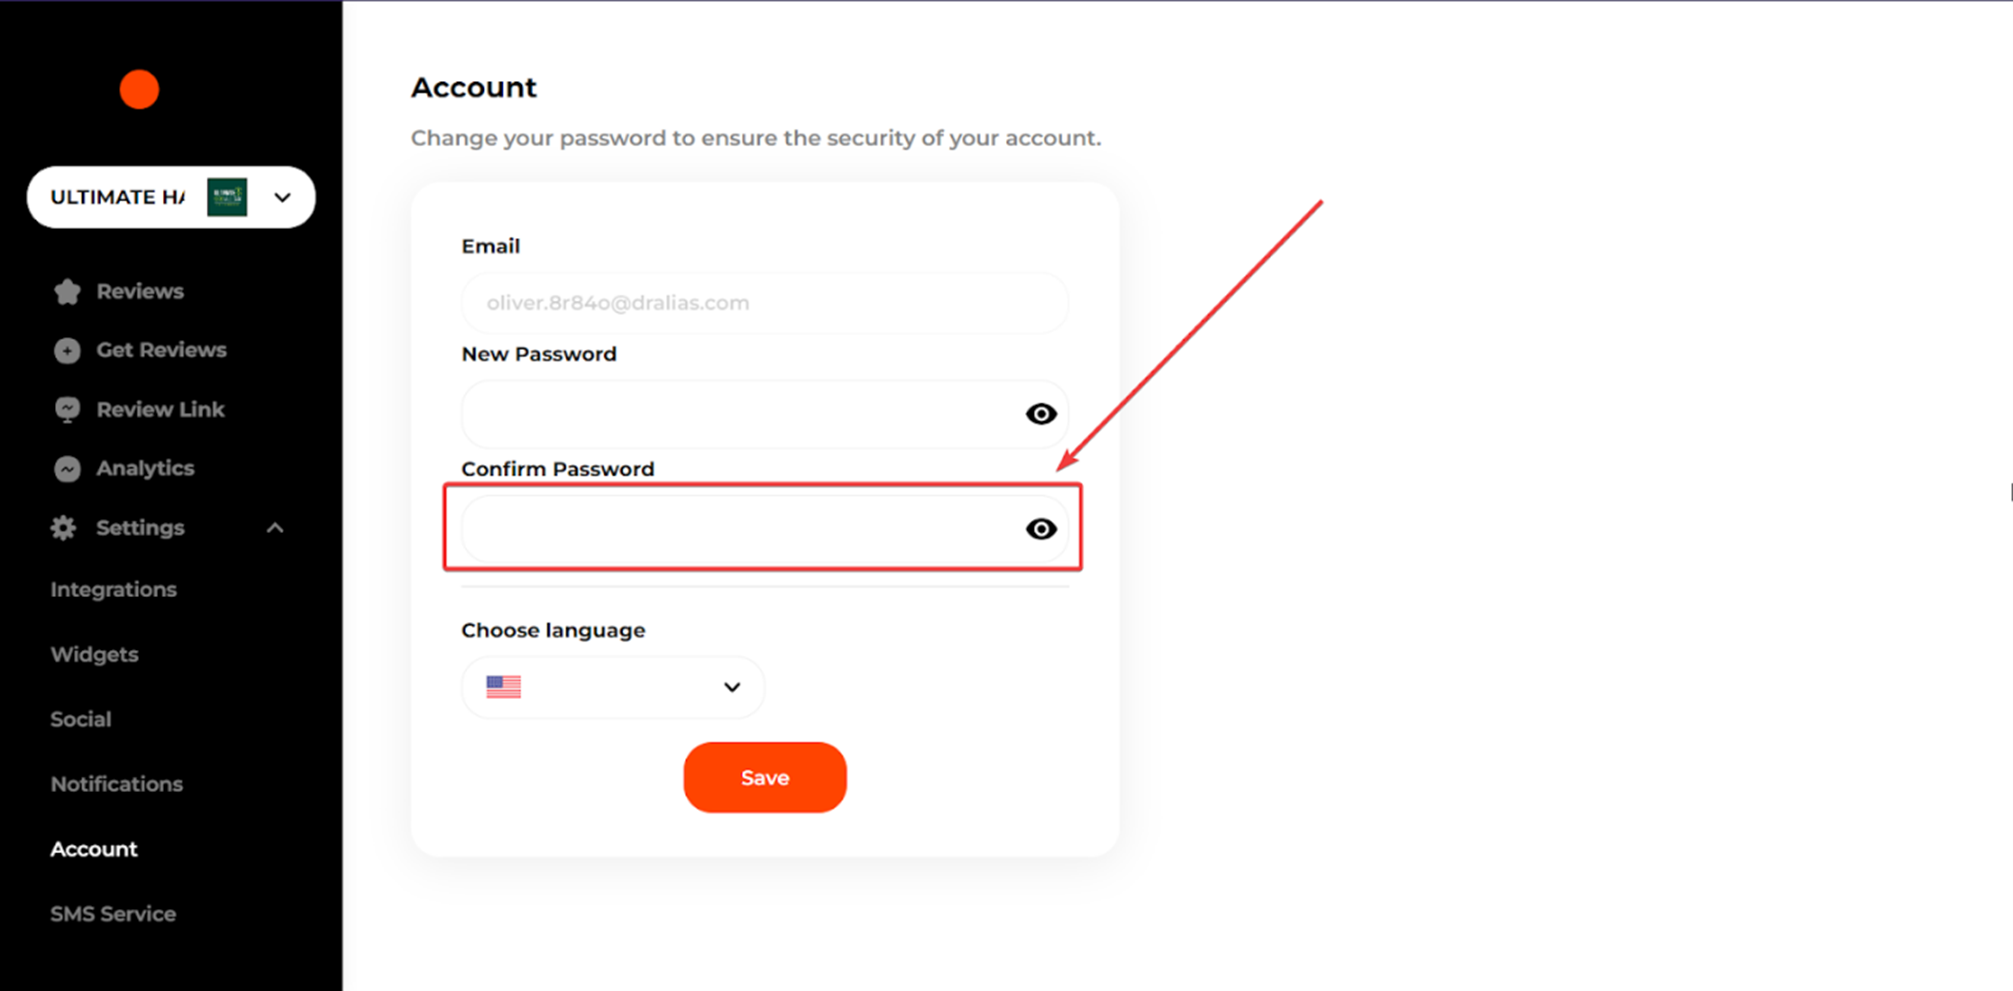
Finally, click Save. Keep your password safe. Moving forward, use your new password to log into your account.
Integrations
To start integrating review platforms, first click Settings on the left sidebar. Then click Integrations.
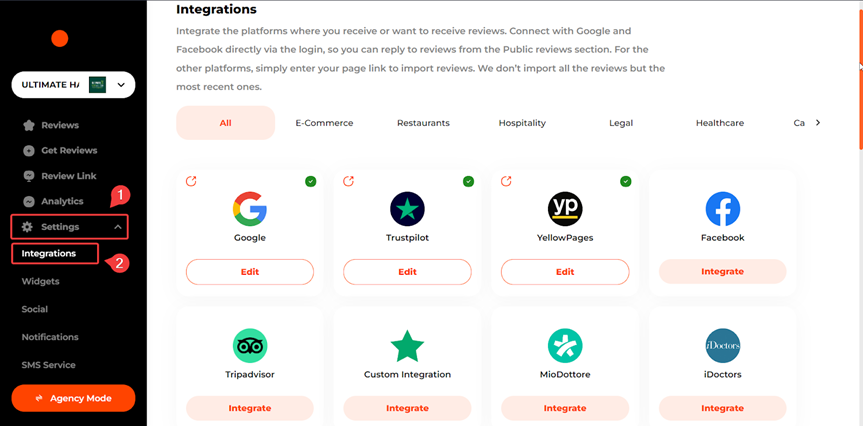
You can integrate over twenty different review platforms. To connect your platform, click Integrate below each platform.
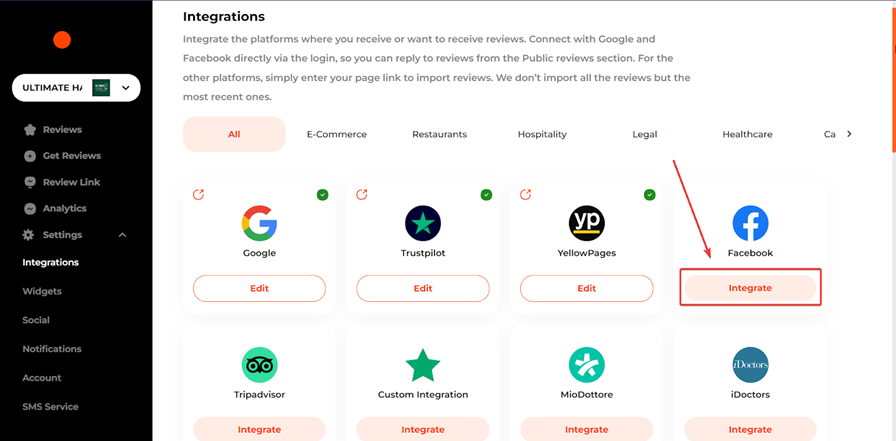
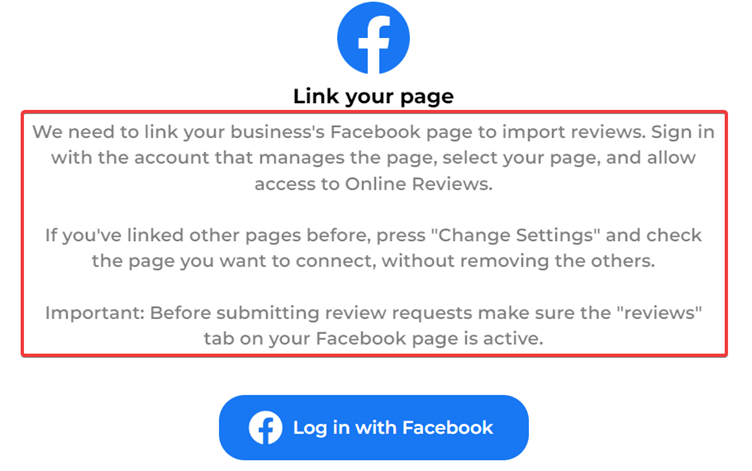
After hitting the Integrate button, you will see on-screen instructions guiding you through the platform integrating process.
For instance, the following screenshot shows the integration instructions for the Facebook page.
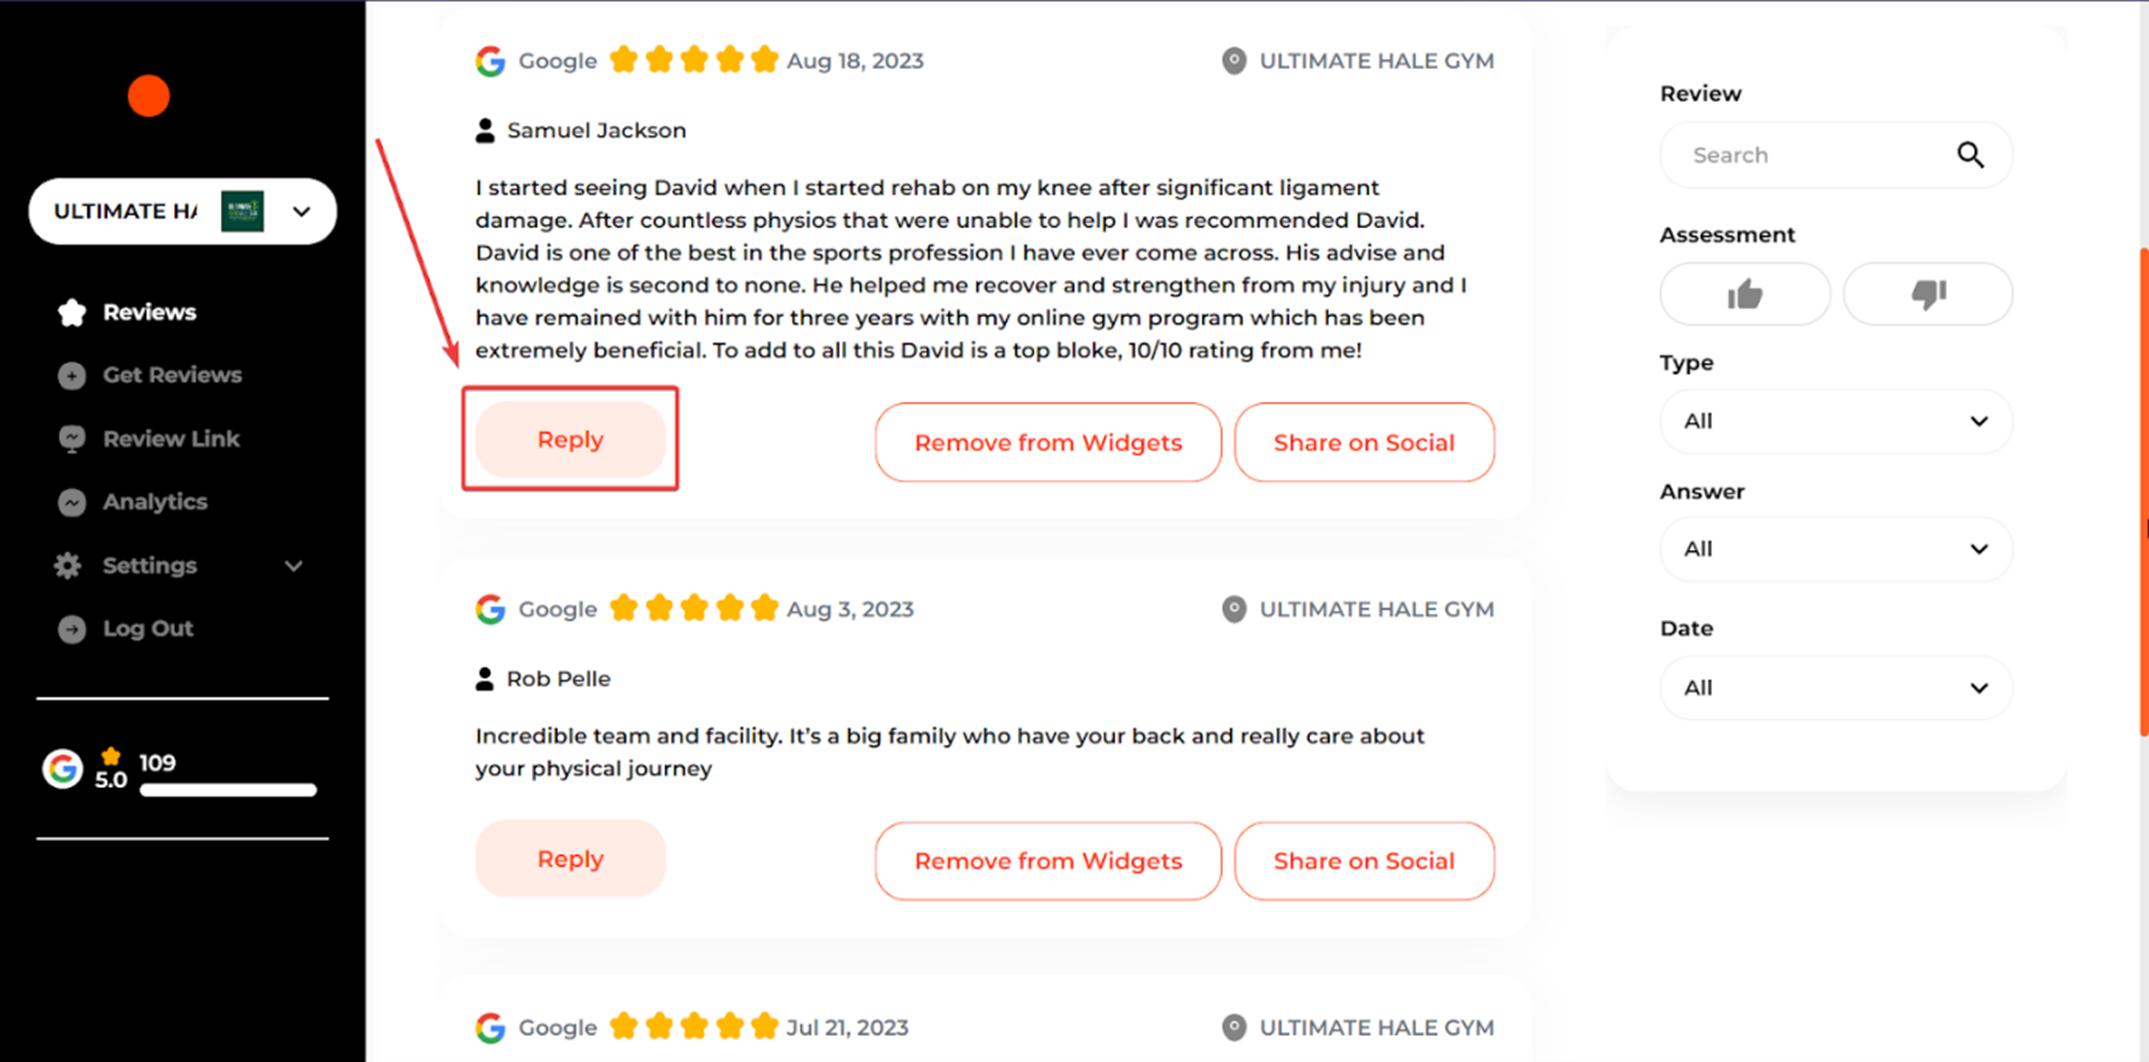
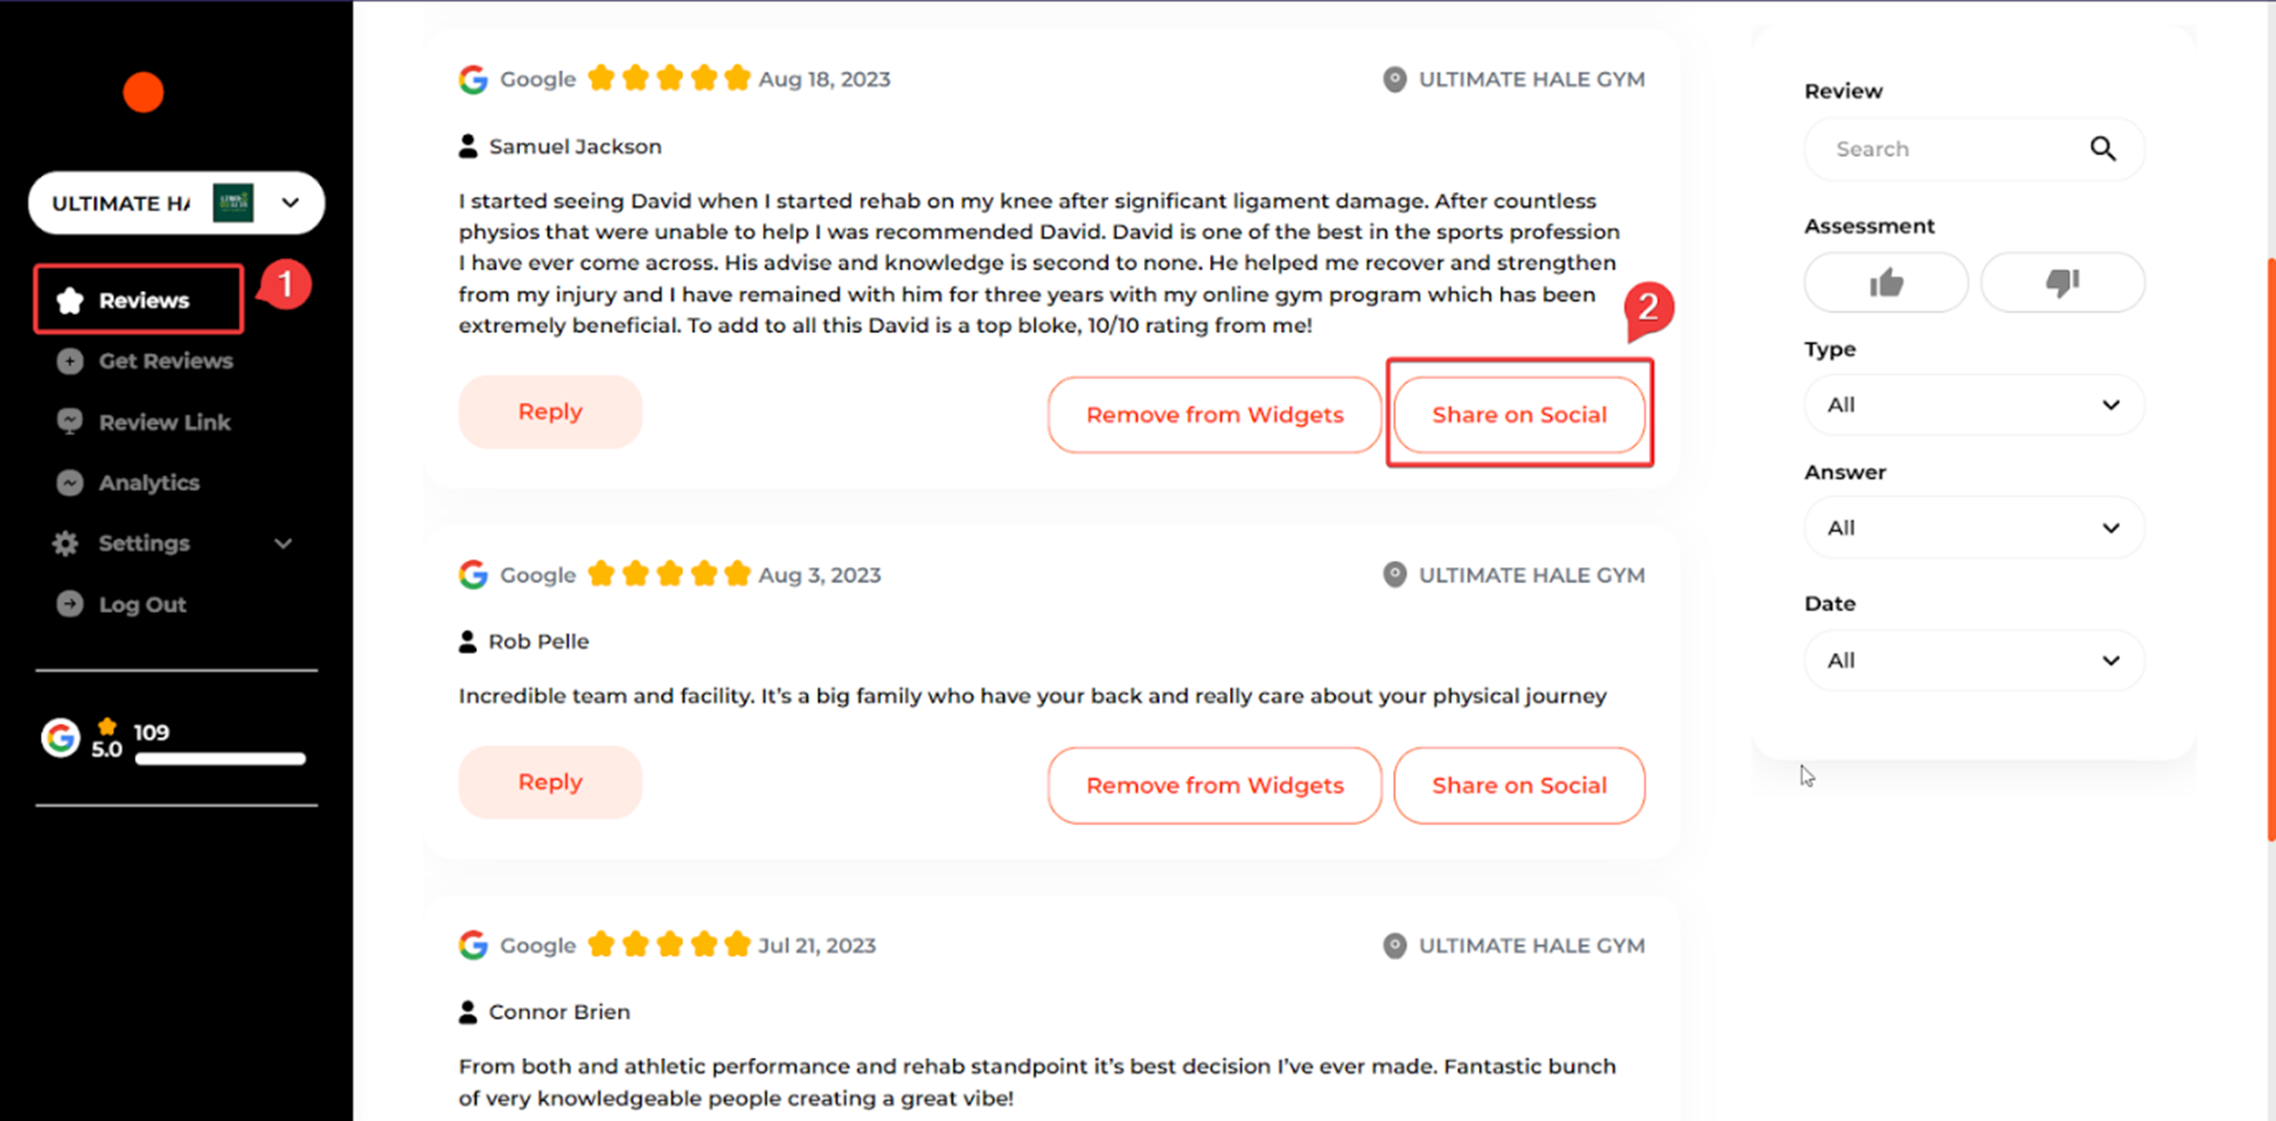
Reviews
The platform feed automatically updates four times a day with new reviews.
On the left sidebar of the Reviews section, you will see the list of integrated platforms with ratings and the number of reviews.
Whereas, on the right sidebar, you can search and find reviews by entering keywords and filter reviews by Assessment, Type, Answer, and Date.

We allow you to monitor and respond to all reviews from the platform.
To do so, go ahead and click Reply under each review.
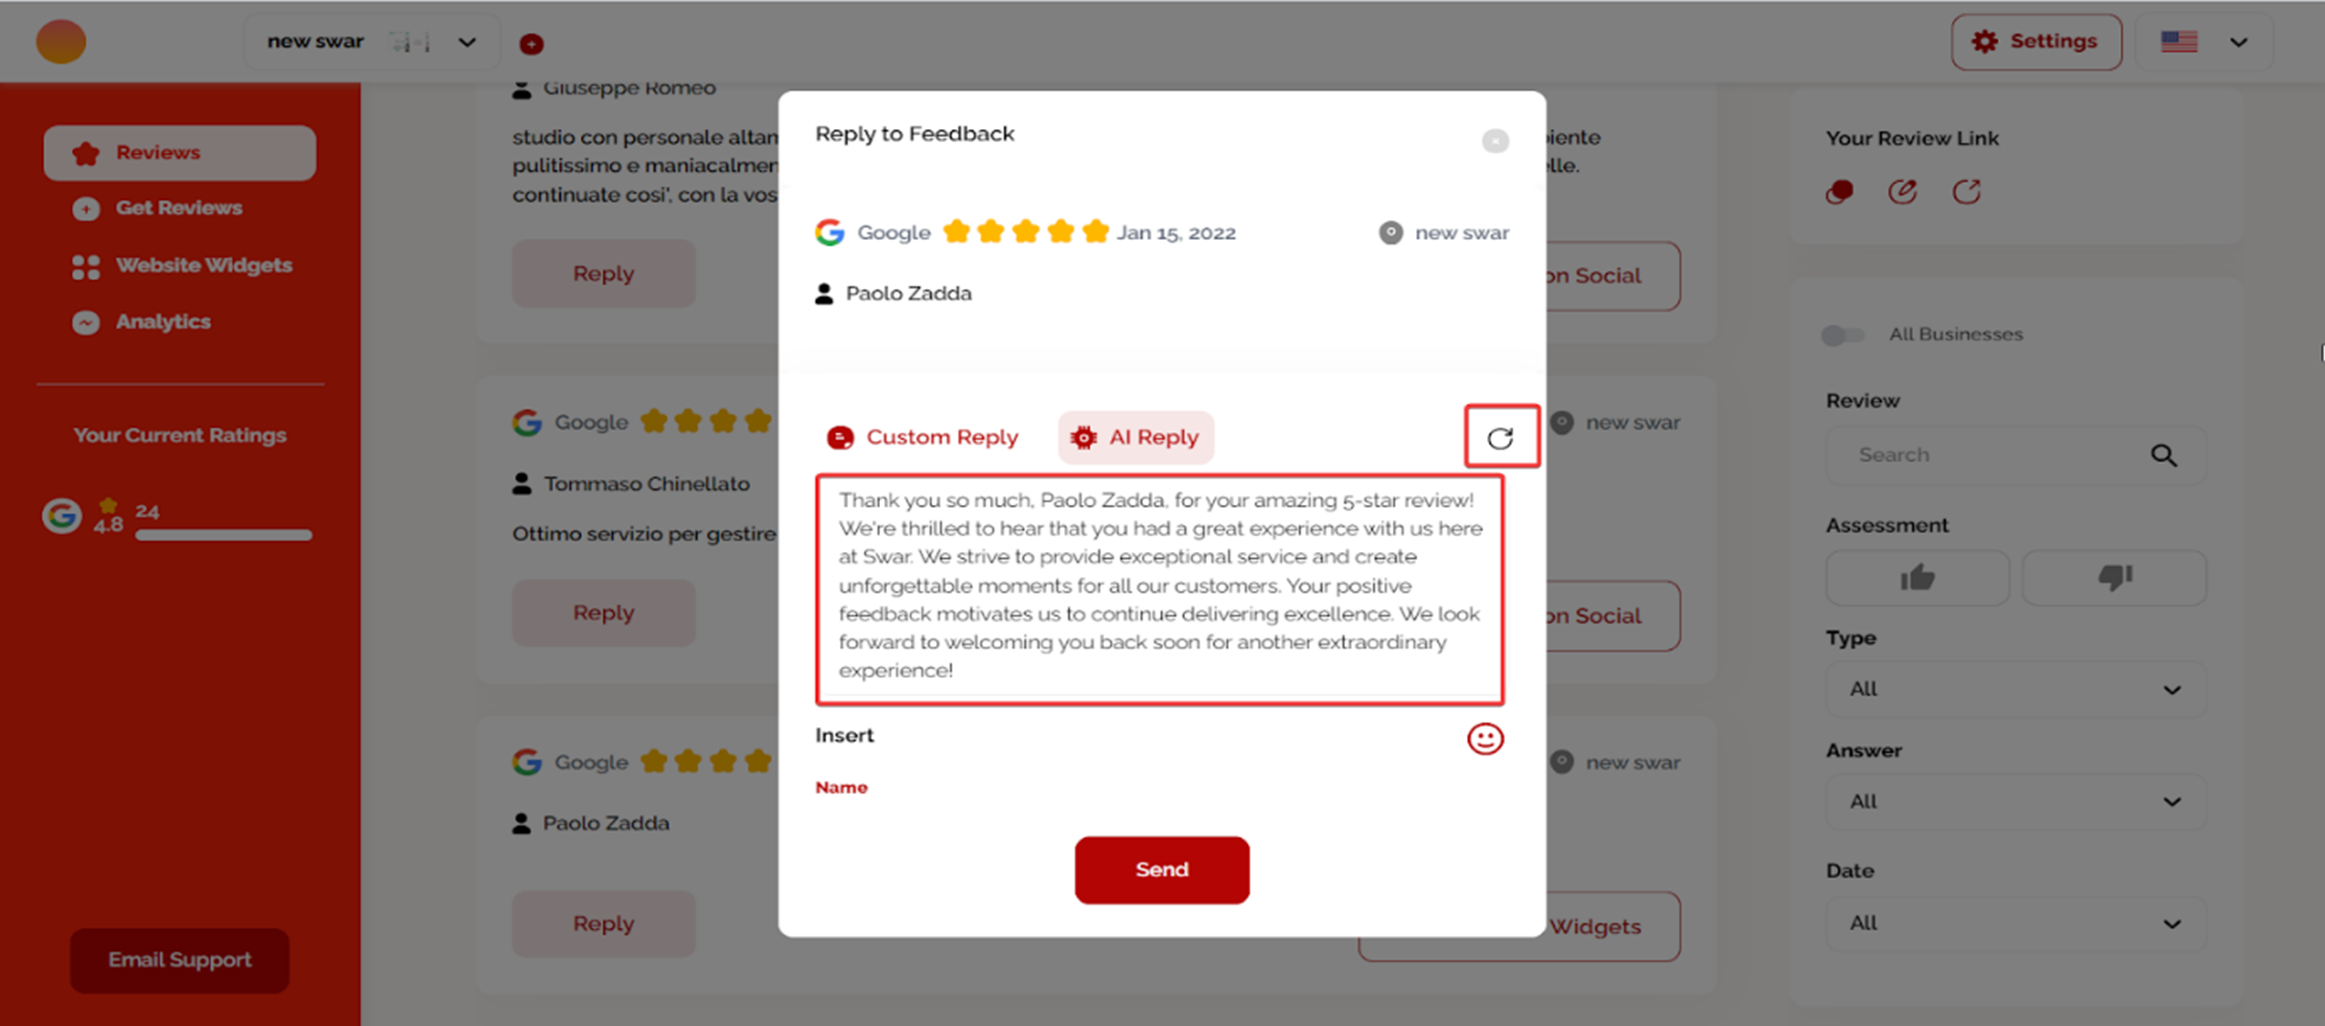
AI Reply
We use the latest AI technology to generate AI replies for your reviews, ultimately saving you time. After clicking Reply on each review, click AI Reply.
The platform automatically generates the reply for your review. If you want AI to generate a new response, click a little “reload” button.
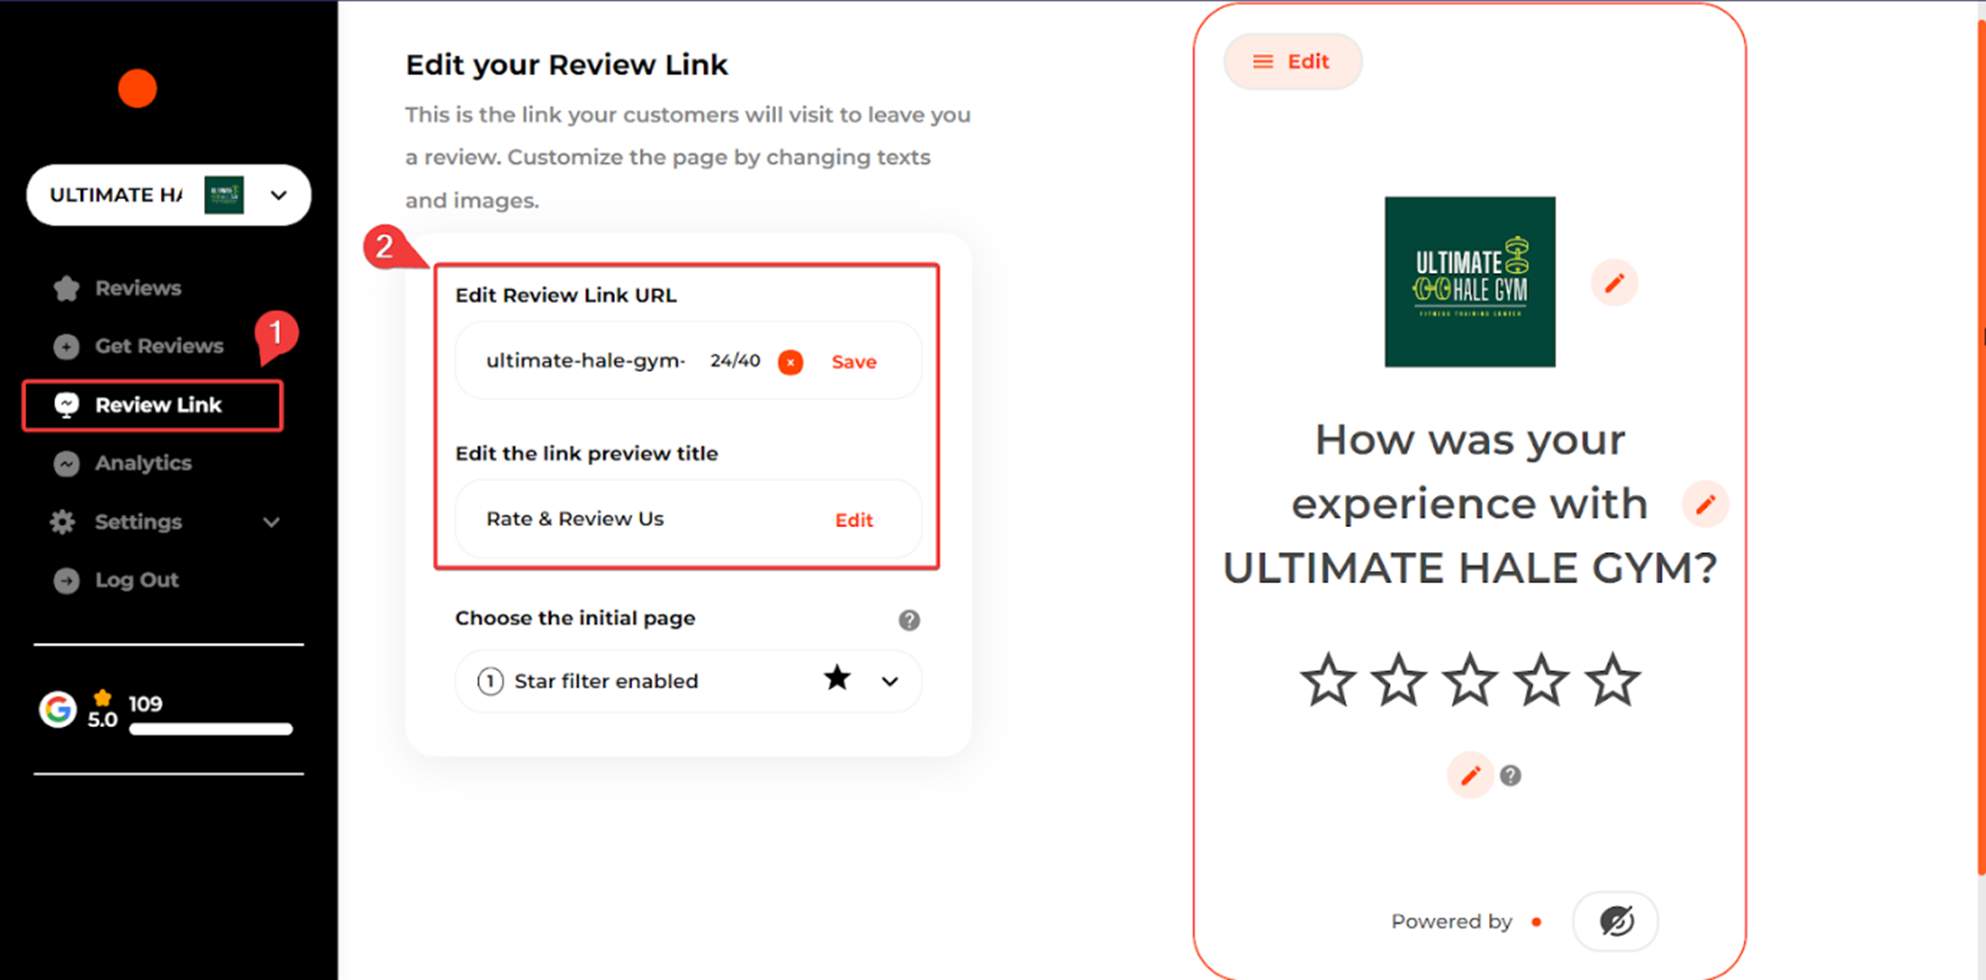
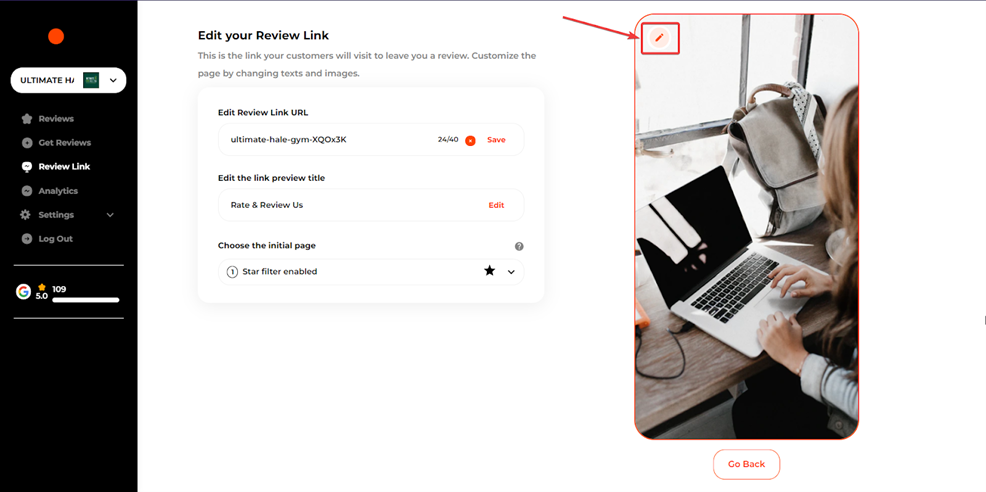
Review Link
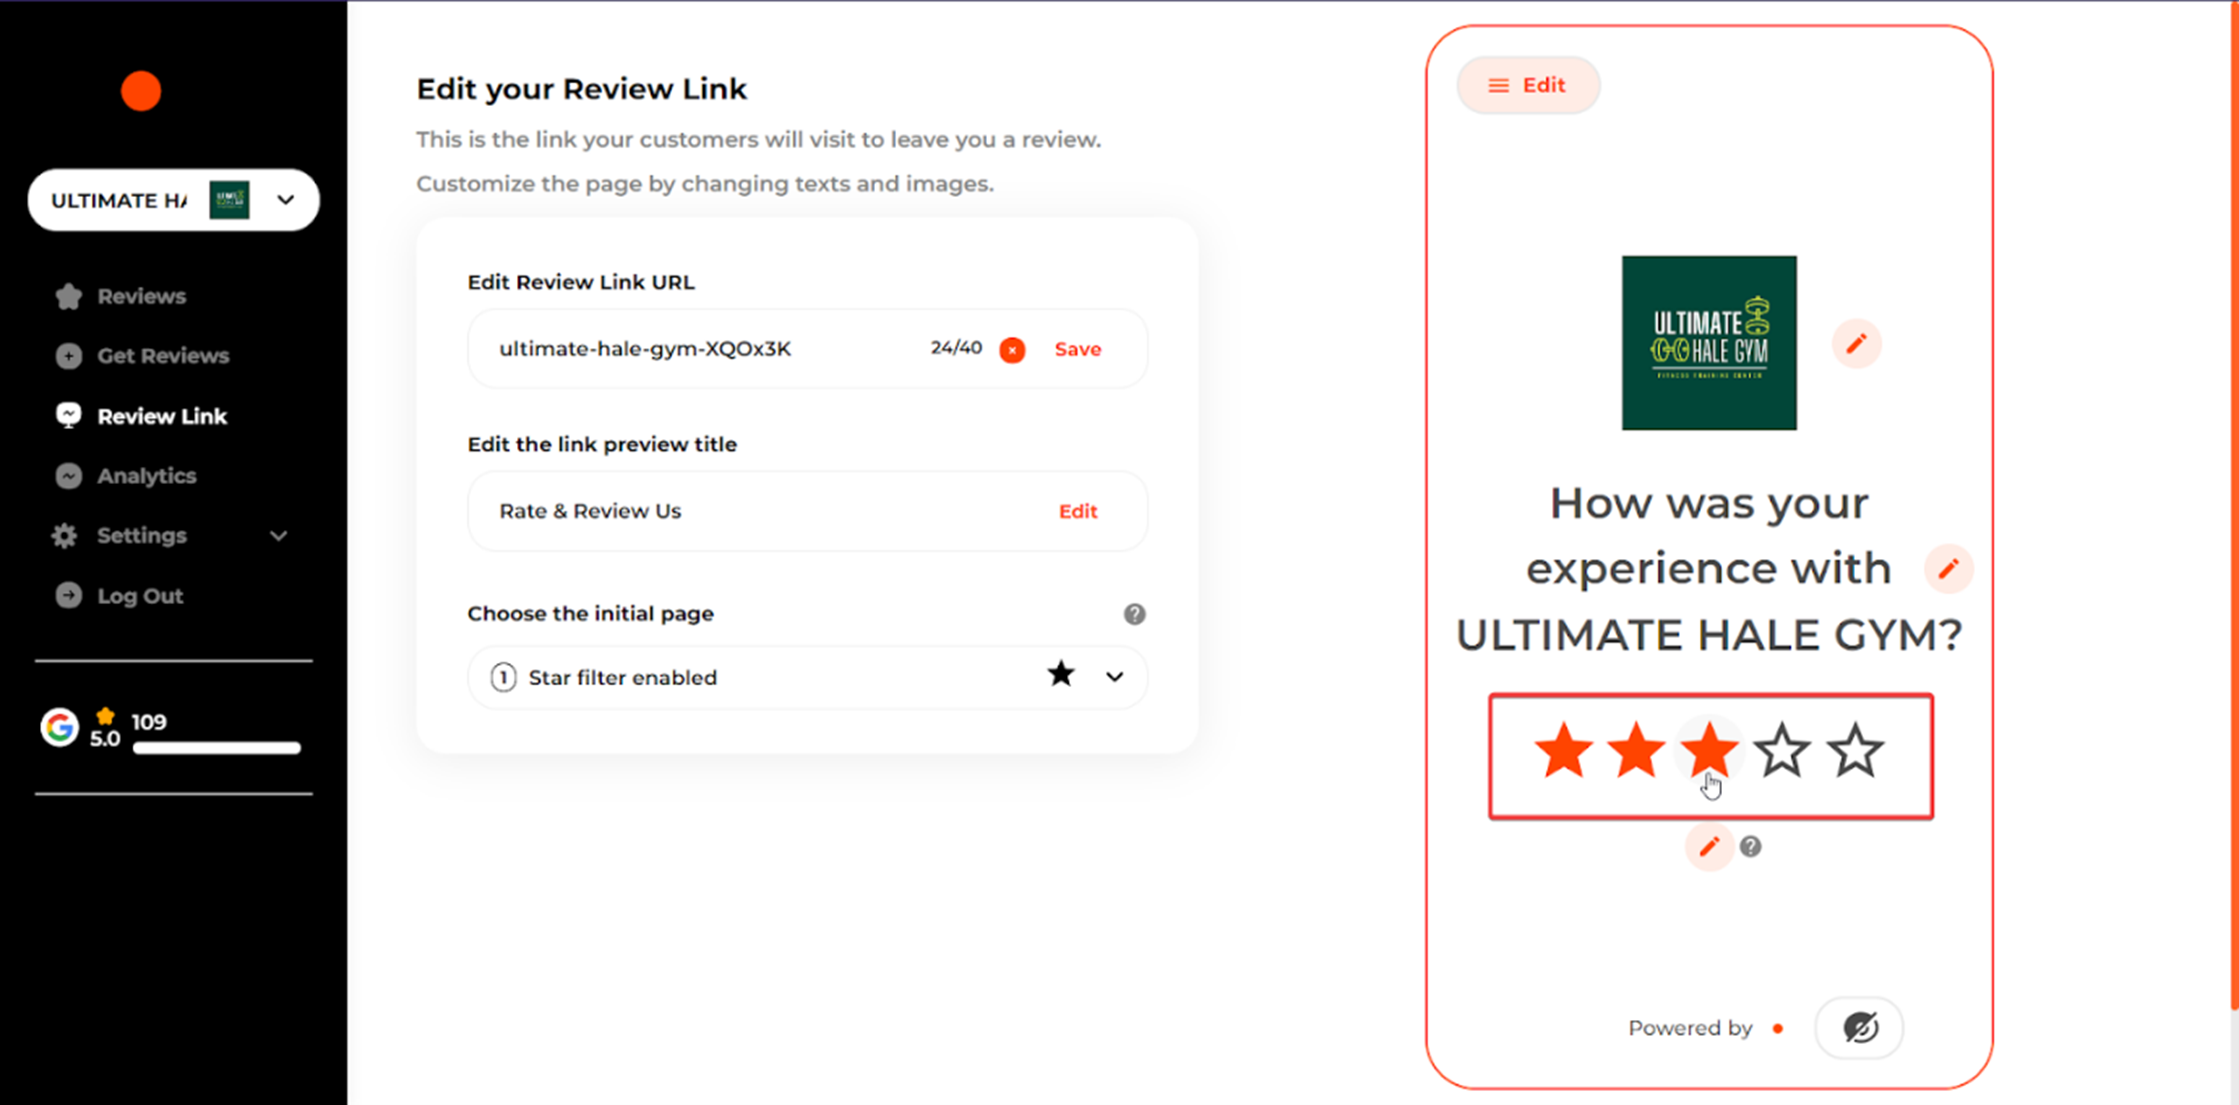
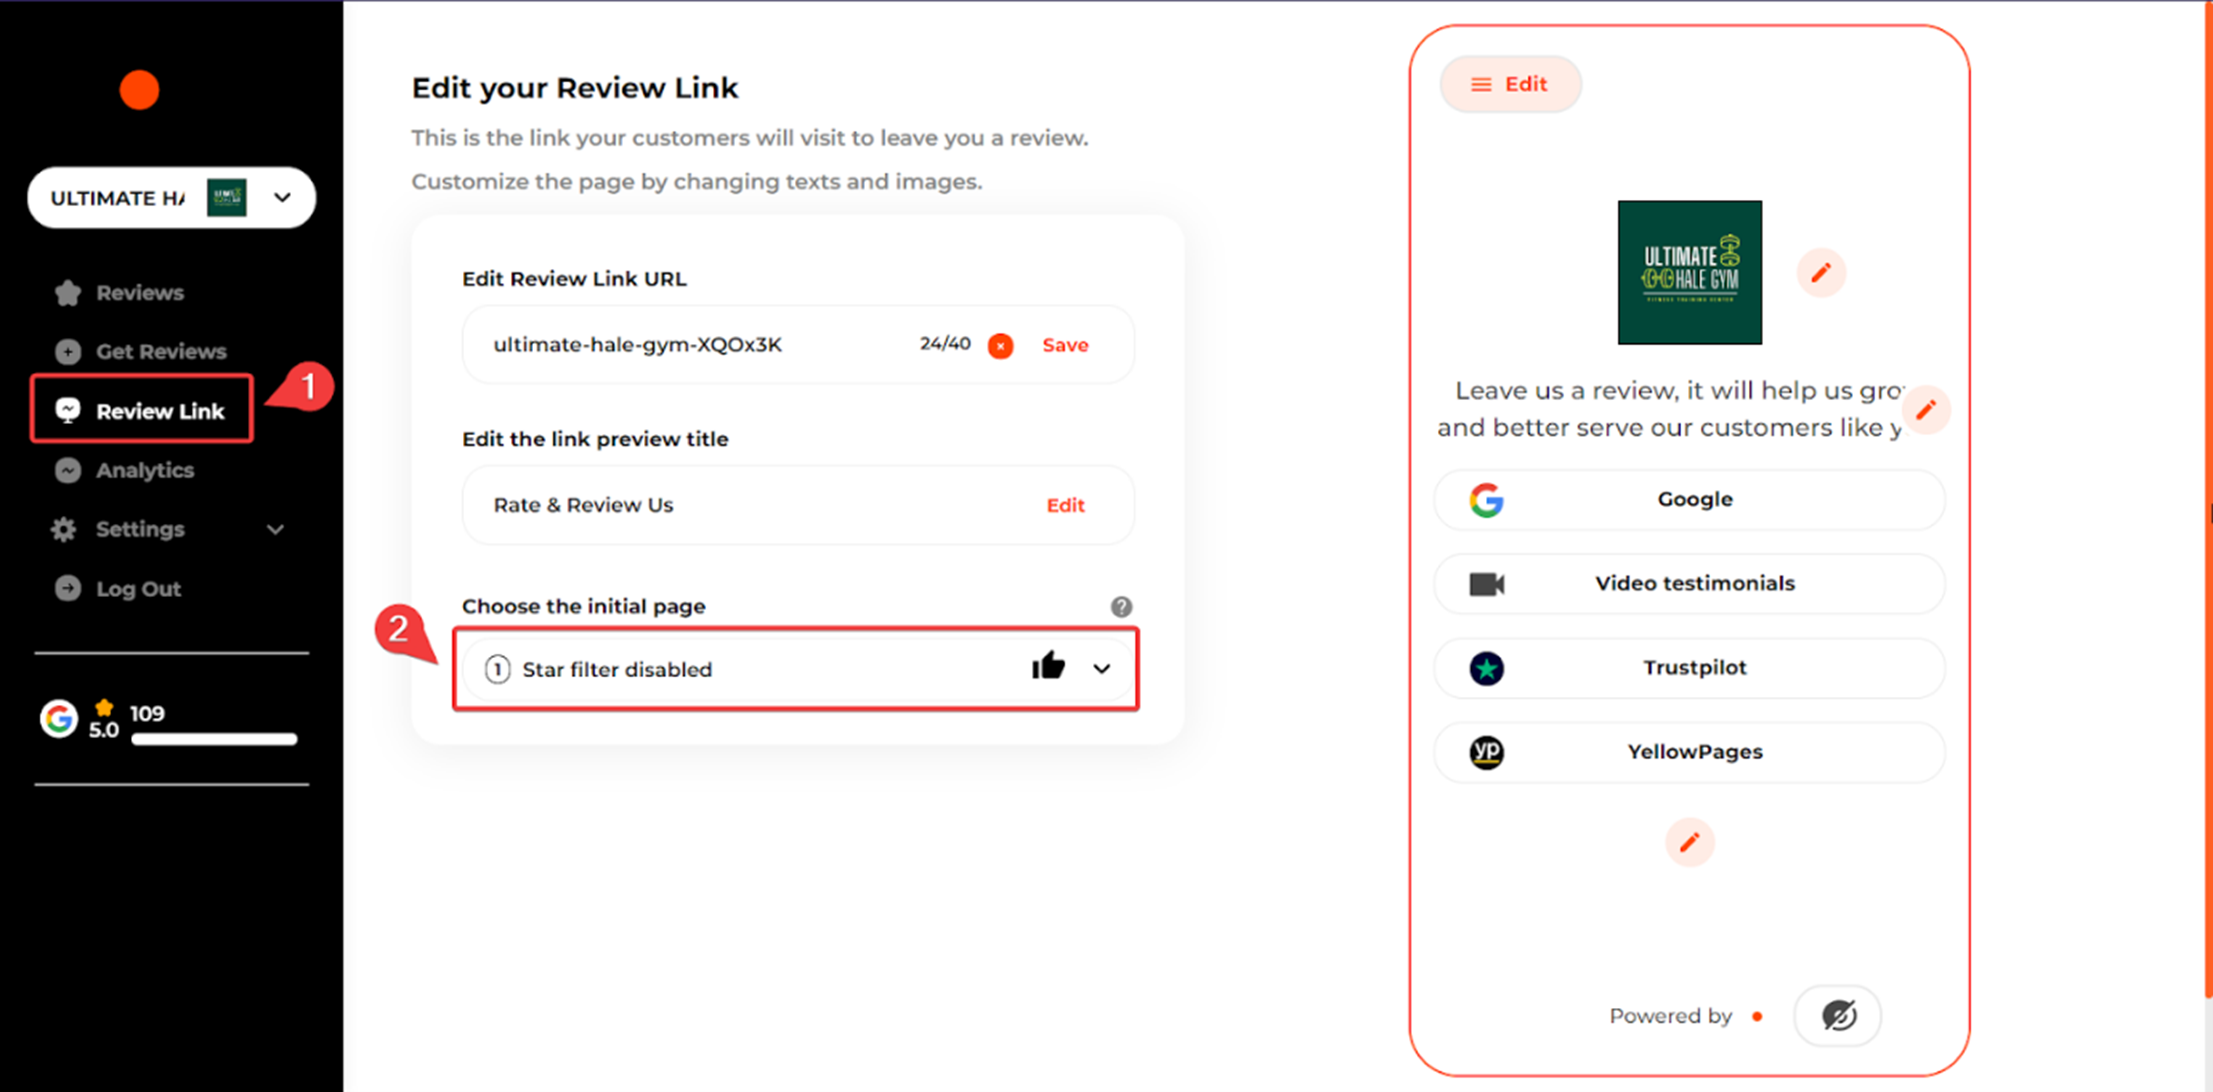
Review Link is the link your customers visit to leave a review. You can customize the review link by clicking the Review Link on the left sidebar.
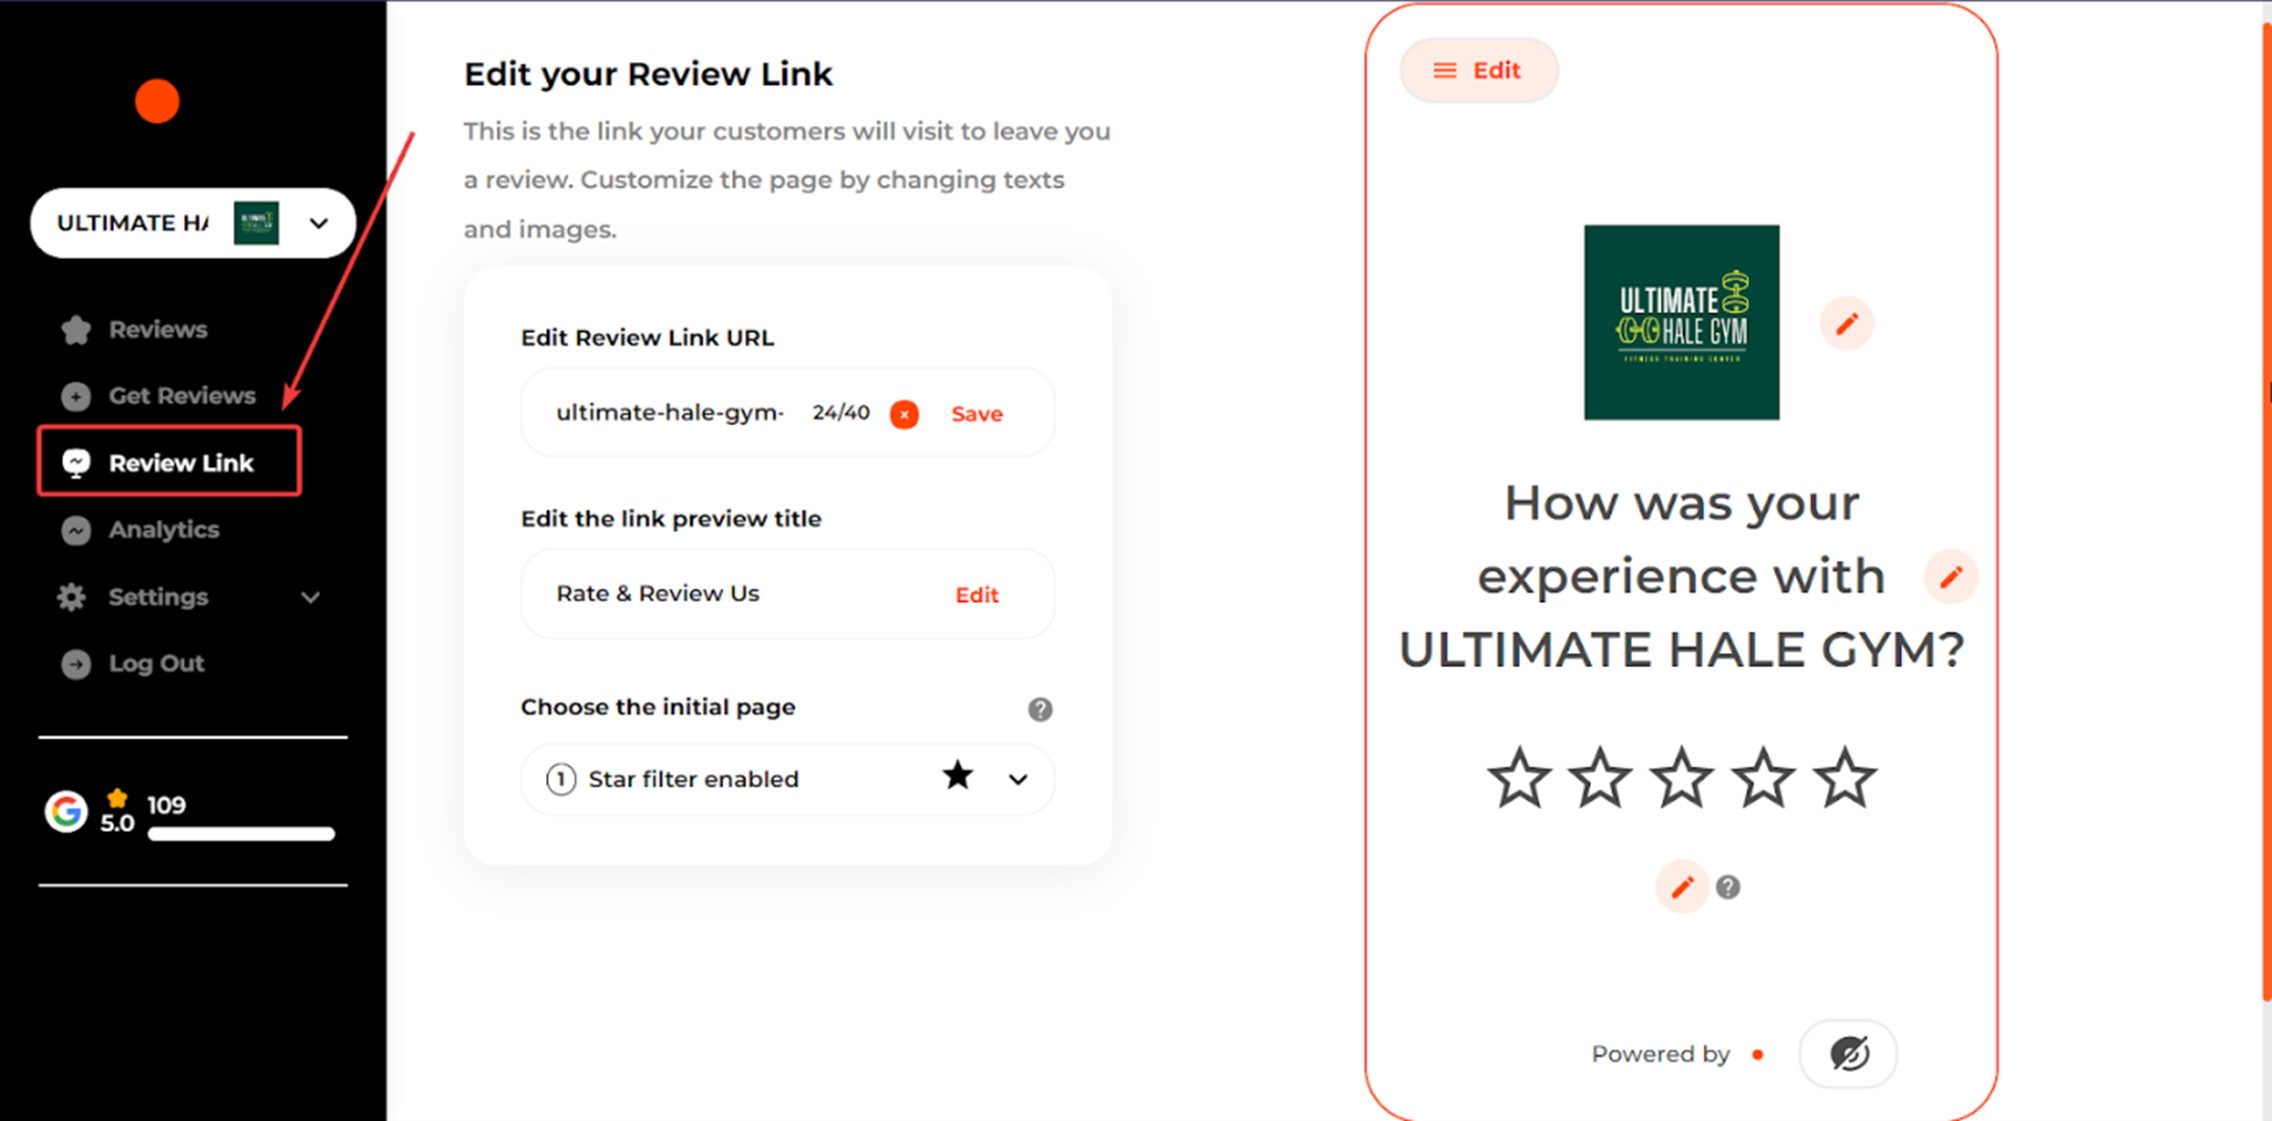
From the Review Link, you can edit the review link URL and link preview title.
Click Desktop Image, and then the little pencil icon in the top left corner will update the desktop image. The image size is 720 px x 900 px.
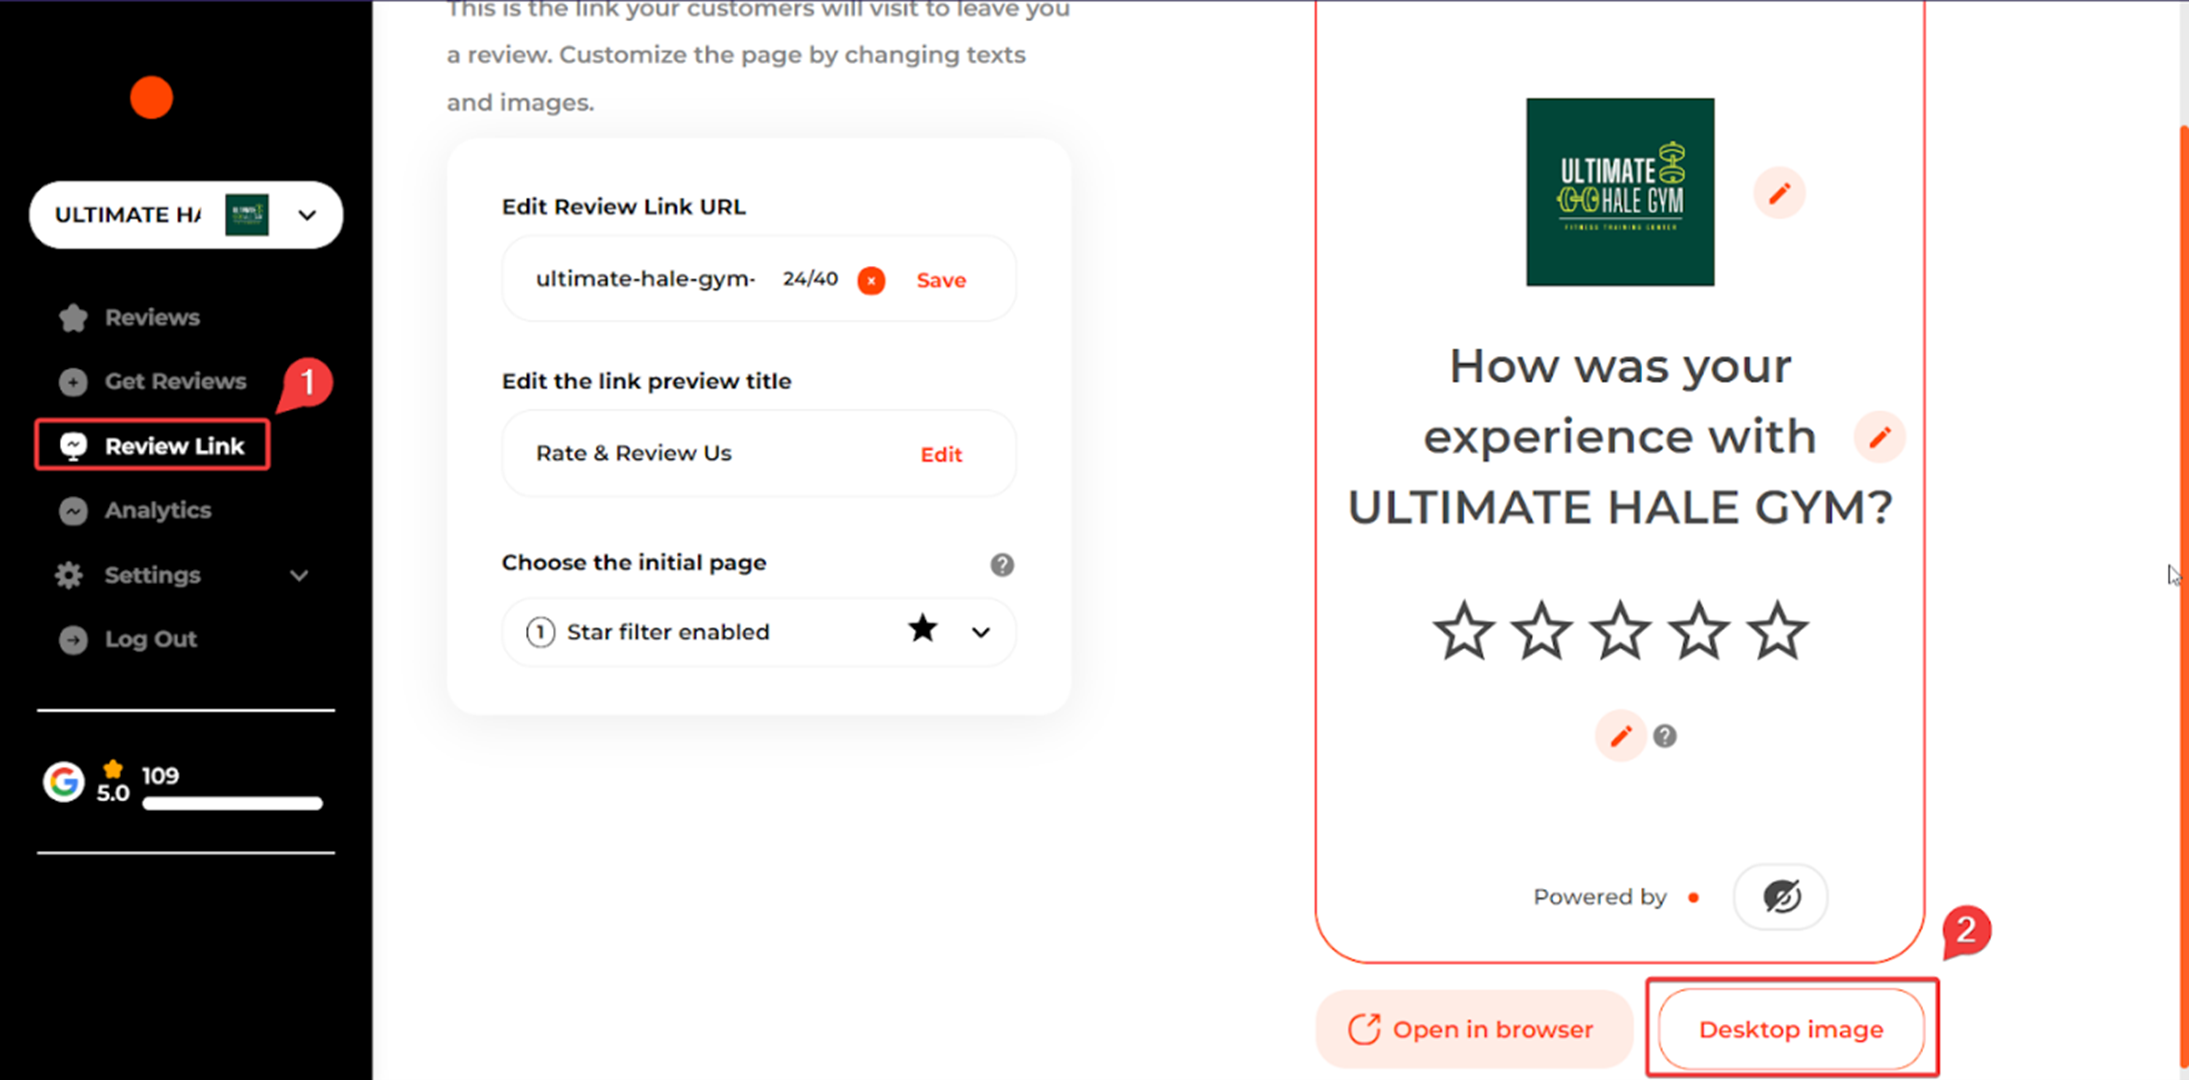
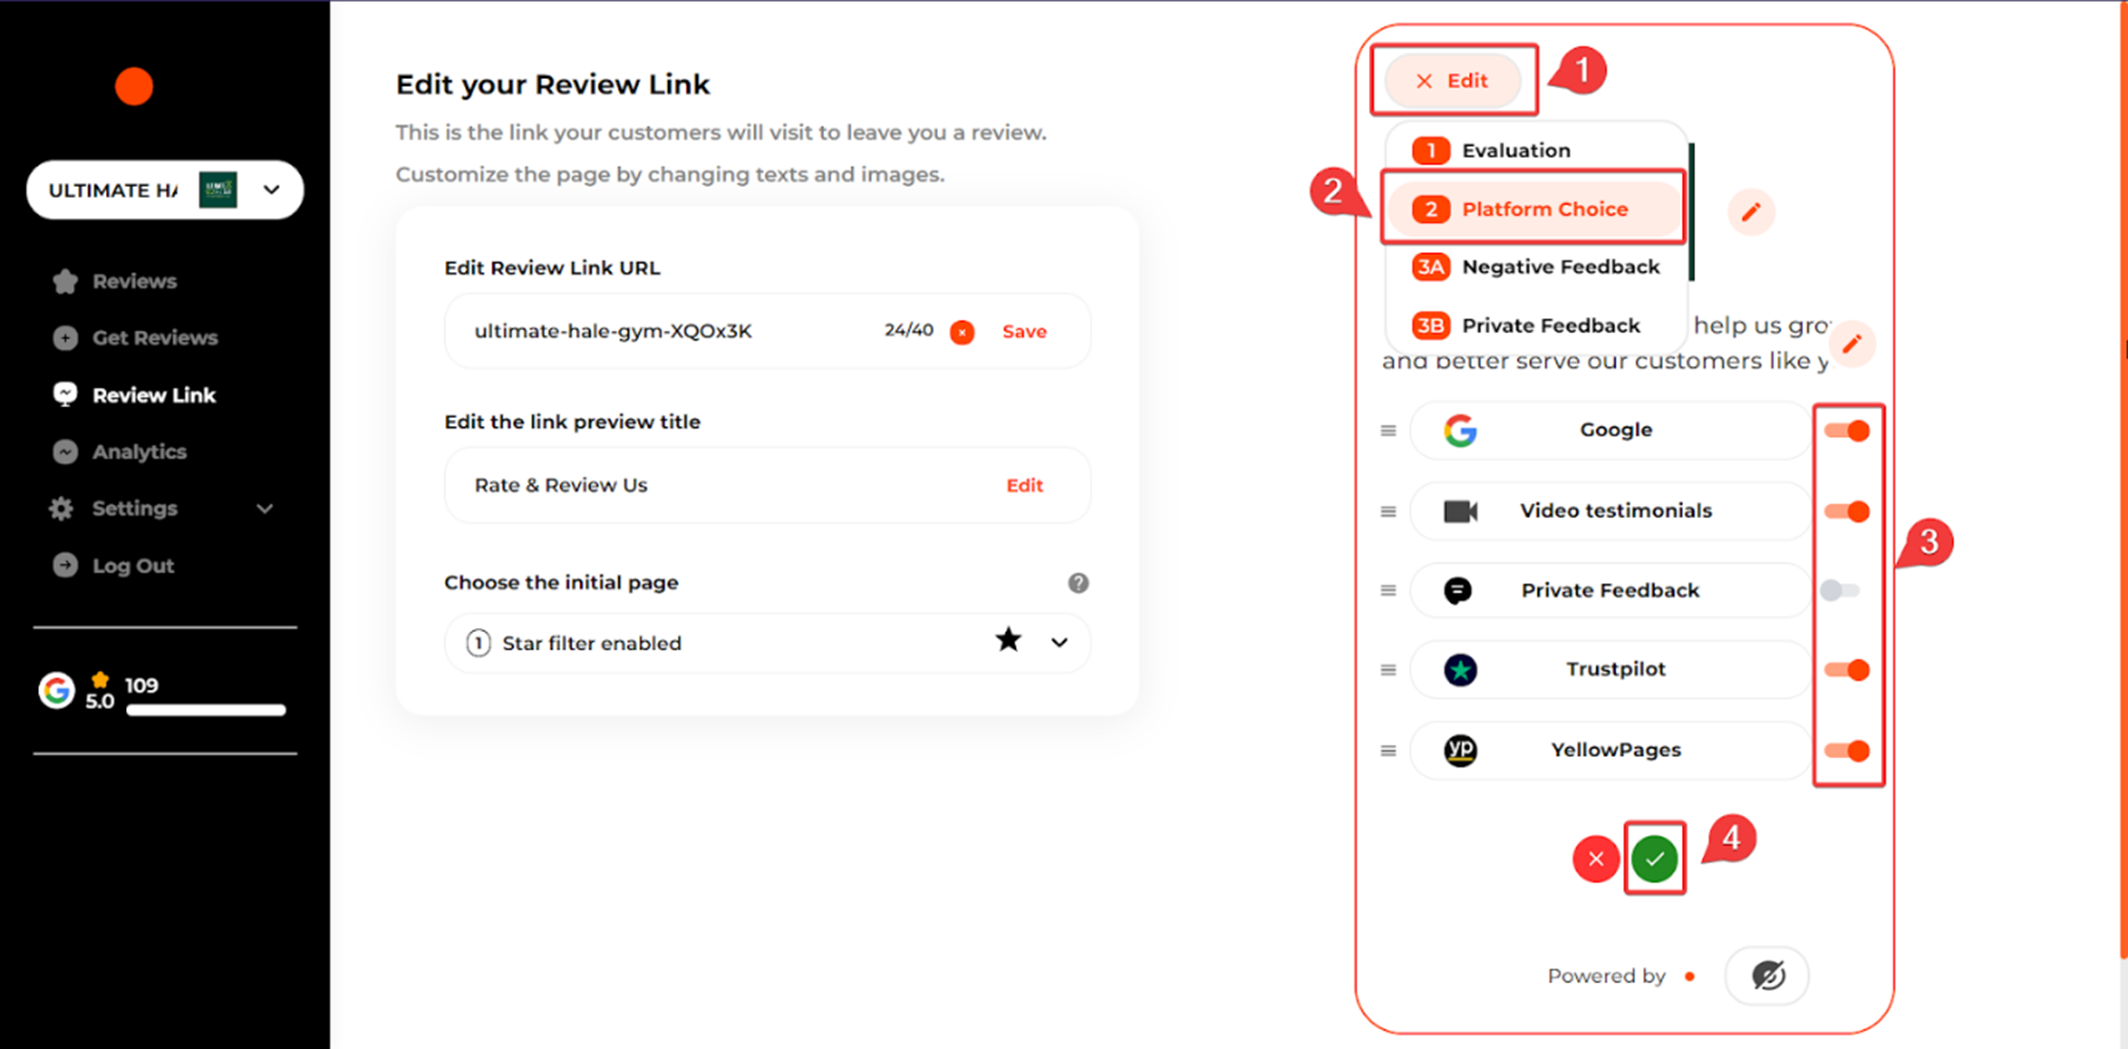
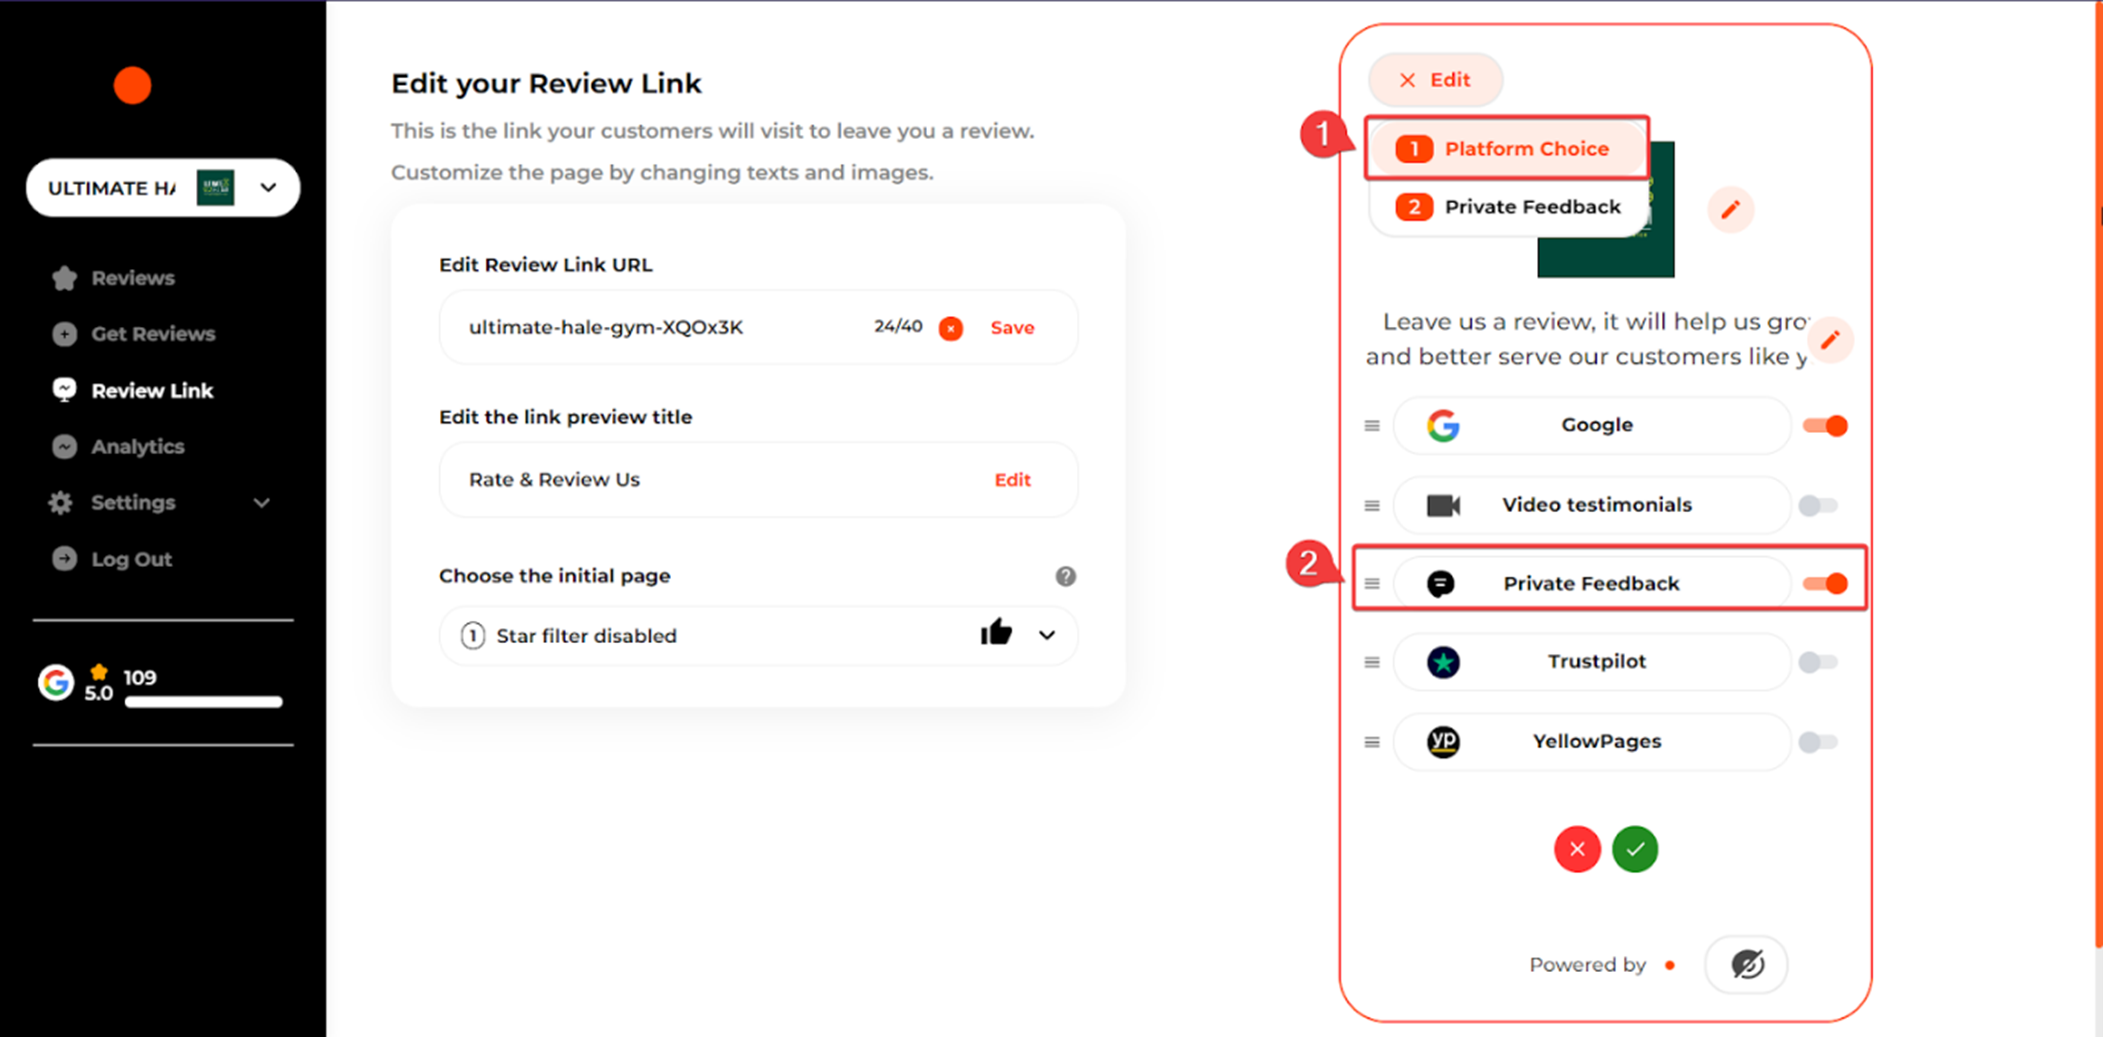
In the Platform Choice section, you can enable or disable platforms you’d like to showcase on the Review Link.
Once you choose the platforms of your choice, save changes by clicking the green checkmark button.
The negative Feedback section shows the page your customers see when they want to write a 1, 2, or 3-star review.
We ask your dissatisfied customer to leave their contact information to follow up later on to answer their concerns privately.
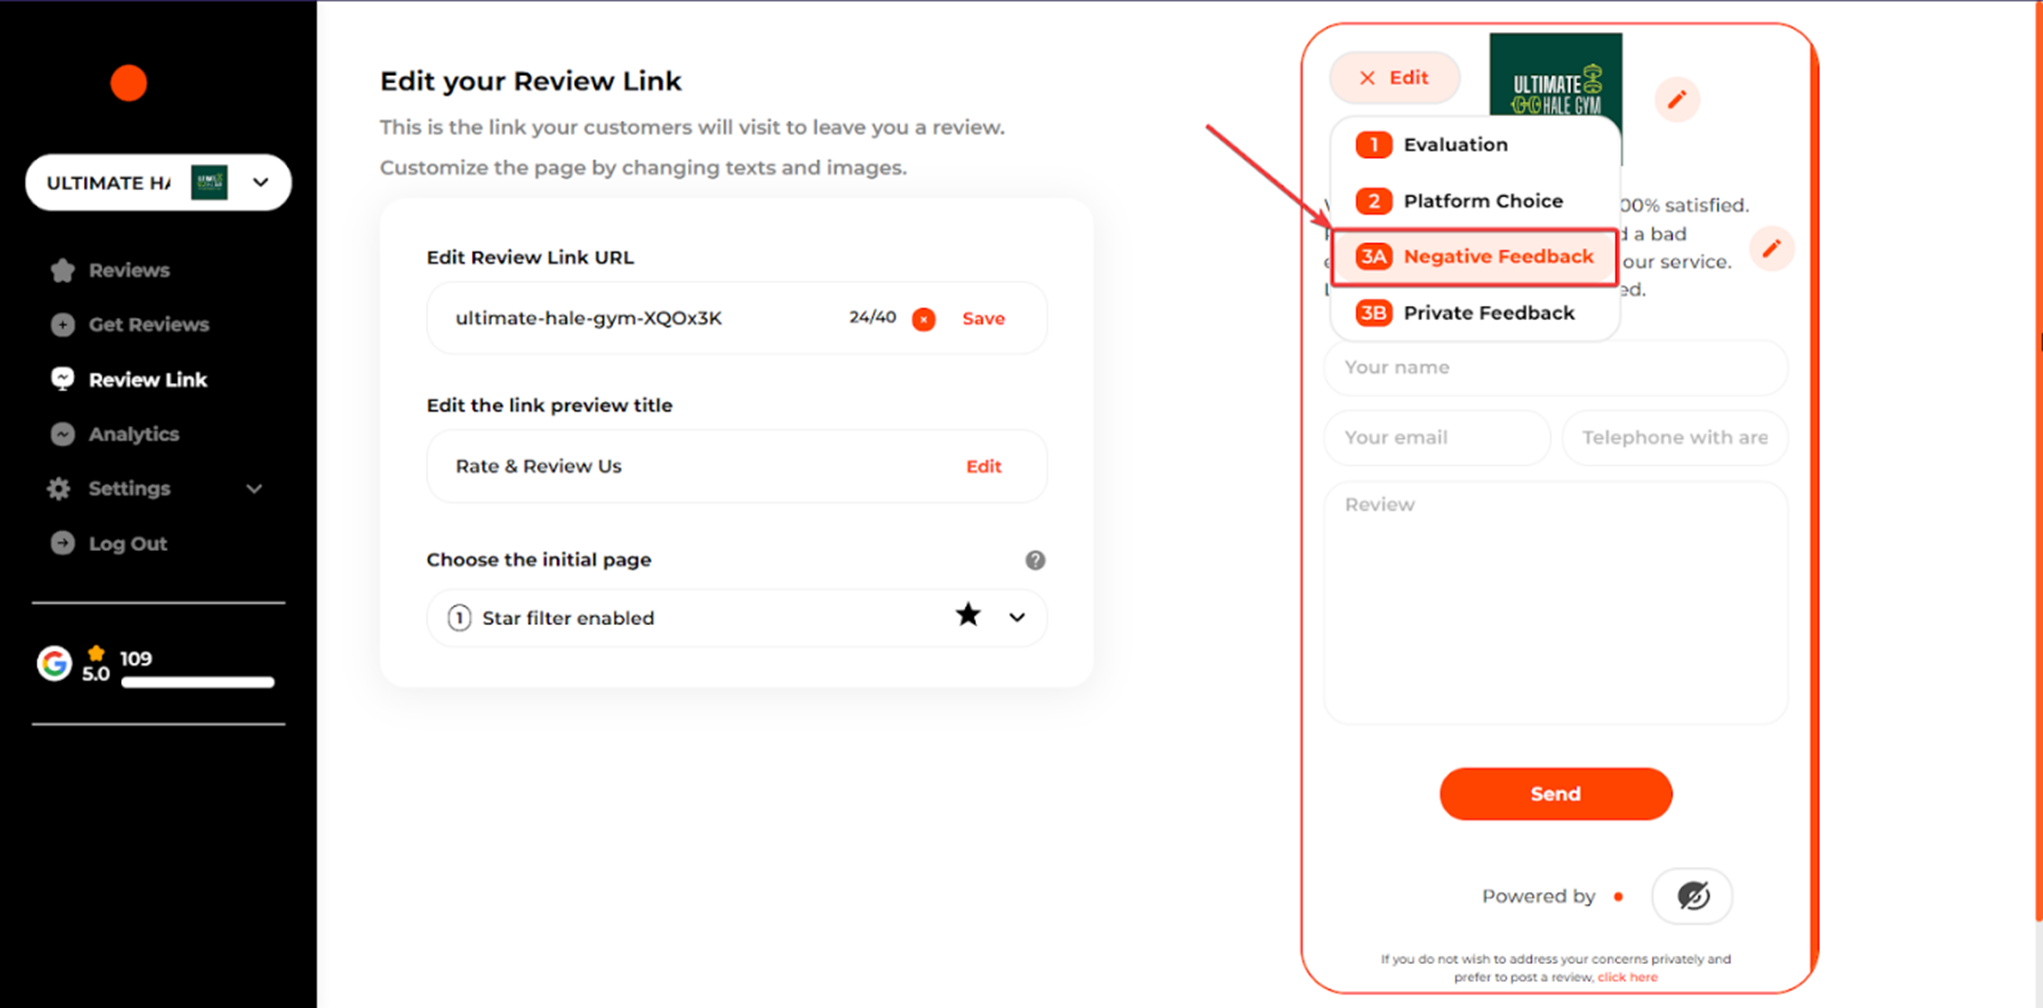
If your customers want to write a 4 or 5-star review, a Negative Feedback page will not be presented.
Showing Negative Feedback page / Internalizing negative feedback is optional, and you can disable it by clicking Review Link and choosing Star filter disabled.
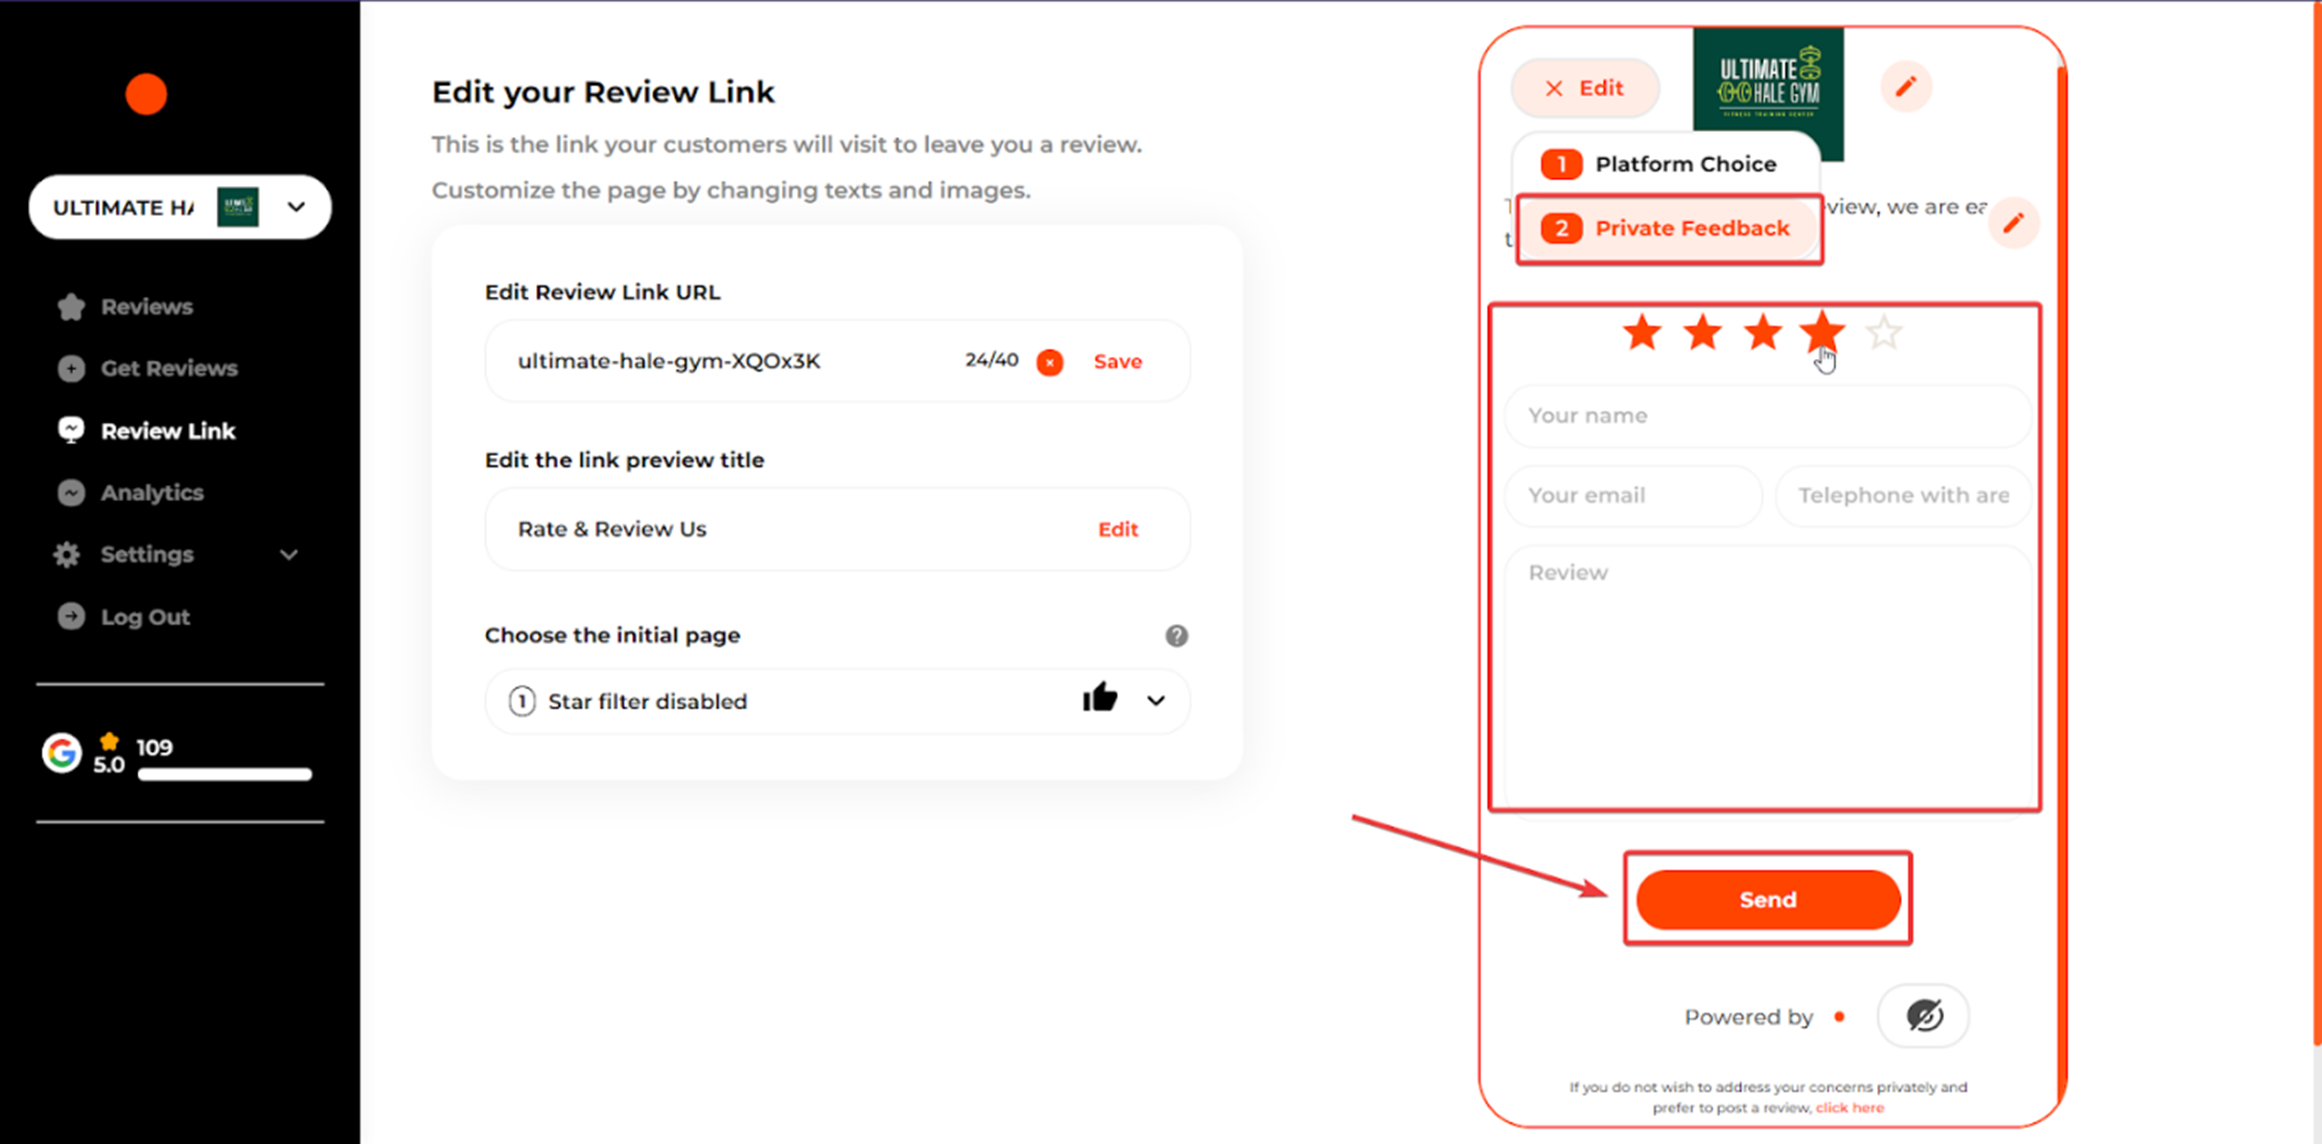
The private Feedback section shows the page your customers see when they want you to leave private feedback from your review link.
Customers can leave private feedback or rate their recent experience by choosing 1 to 5 stars, filling out a quick form, and then clicking Send.
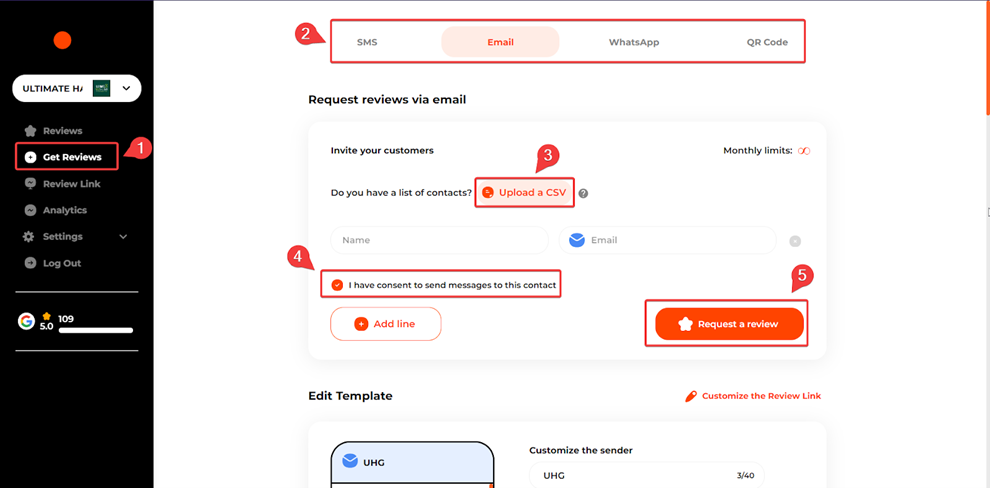
Request Reviews
You can request reviews by clicking Get Reviews on the left sidebar and starting to request reviews via SMS, Email, WhatsApp, and QR Code.
To send review requests, you can Upload a CSV file or invite customers individually by manually entering your Name and Number/Email (to add a new customer, click “Add line”).
Make sure you have consent to send messages. Check I have consent to send messages to this contact and then click Request a review.
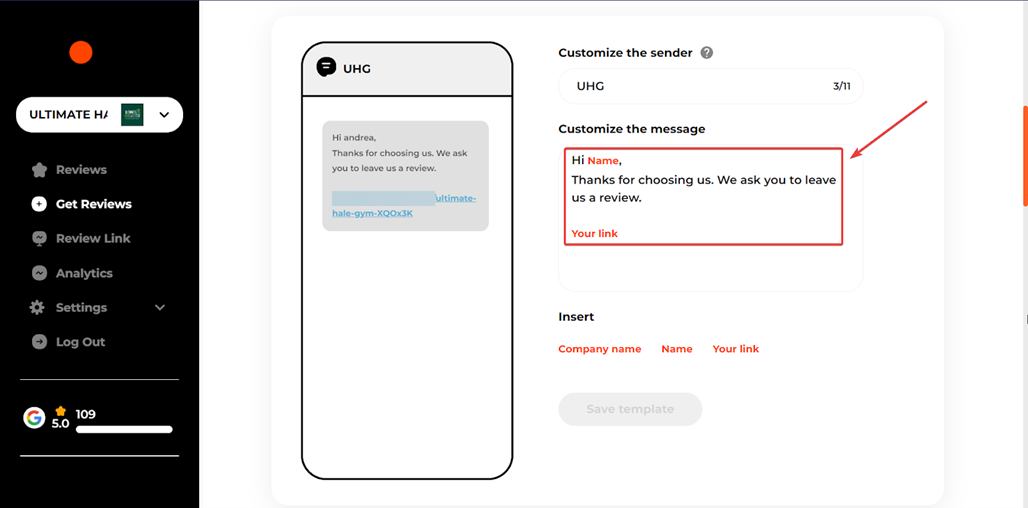
Once you are in the Get Reviews section, scroll down, and you can customize review request templates for SMS, Email, and WhatsApp.
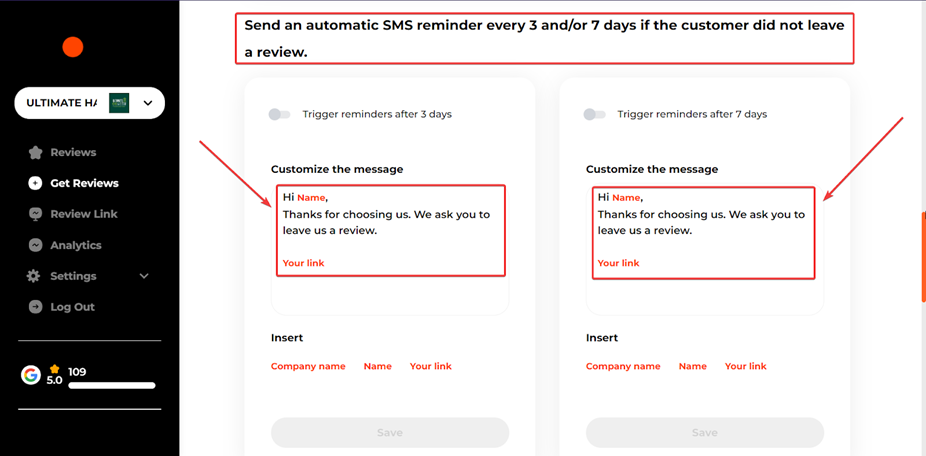
You can optionally send an automatic SMS/Email reminder after 3 and/or 7 days if the customer doesn’t leave a review on the initial request.
We allow you to customize SMS/Email reminder templates too.
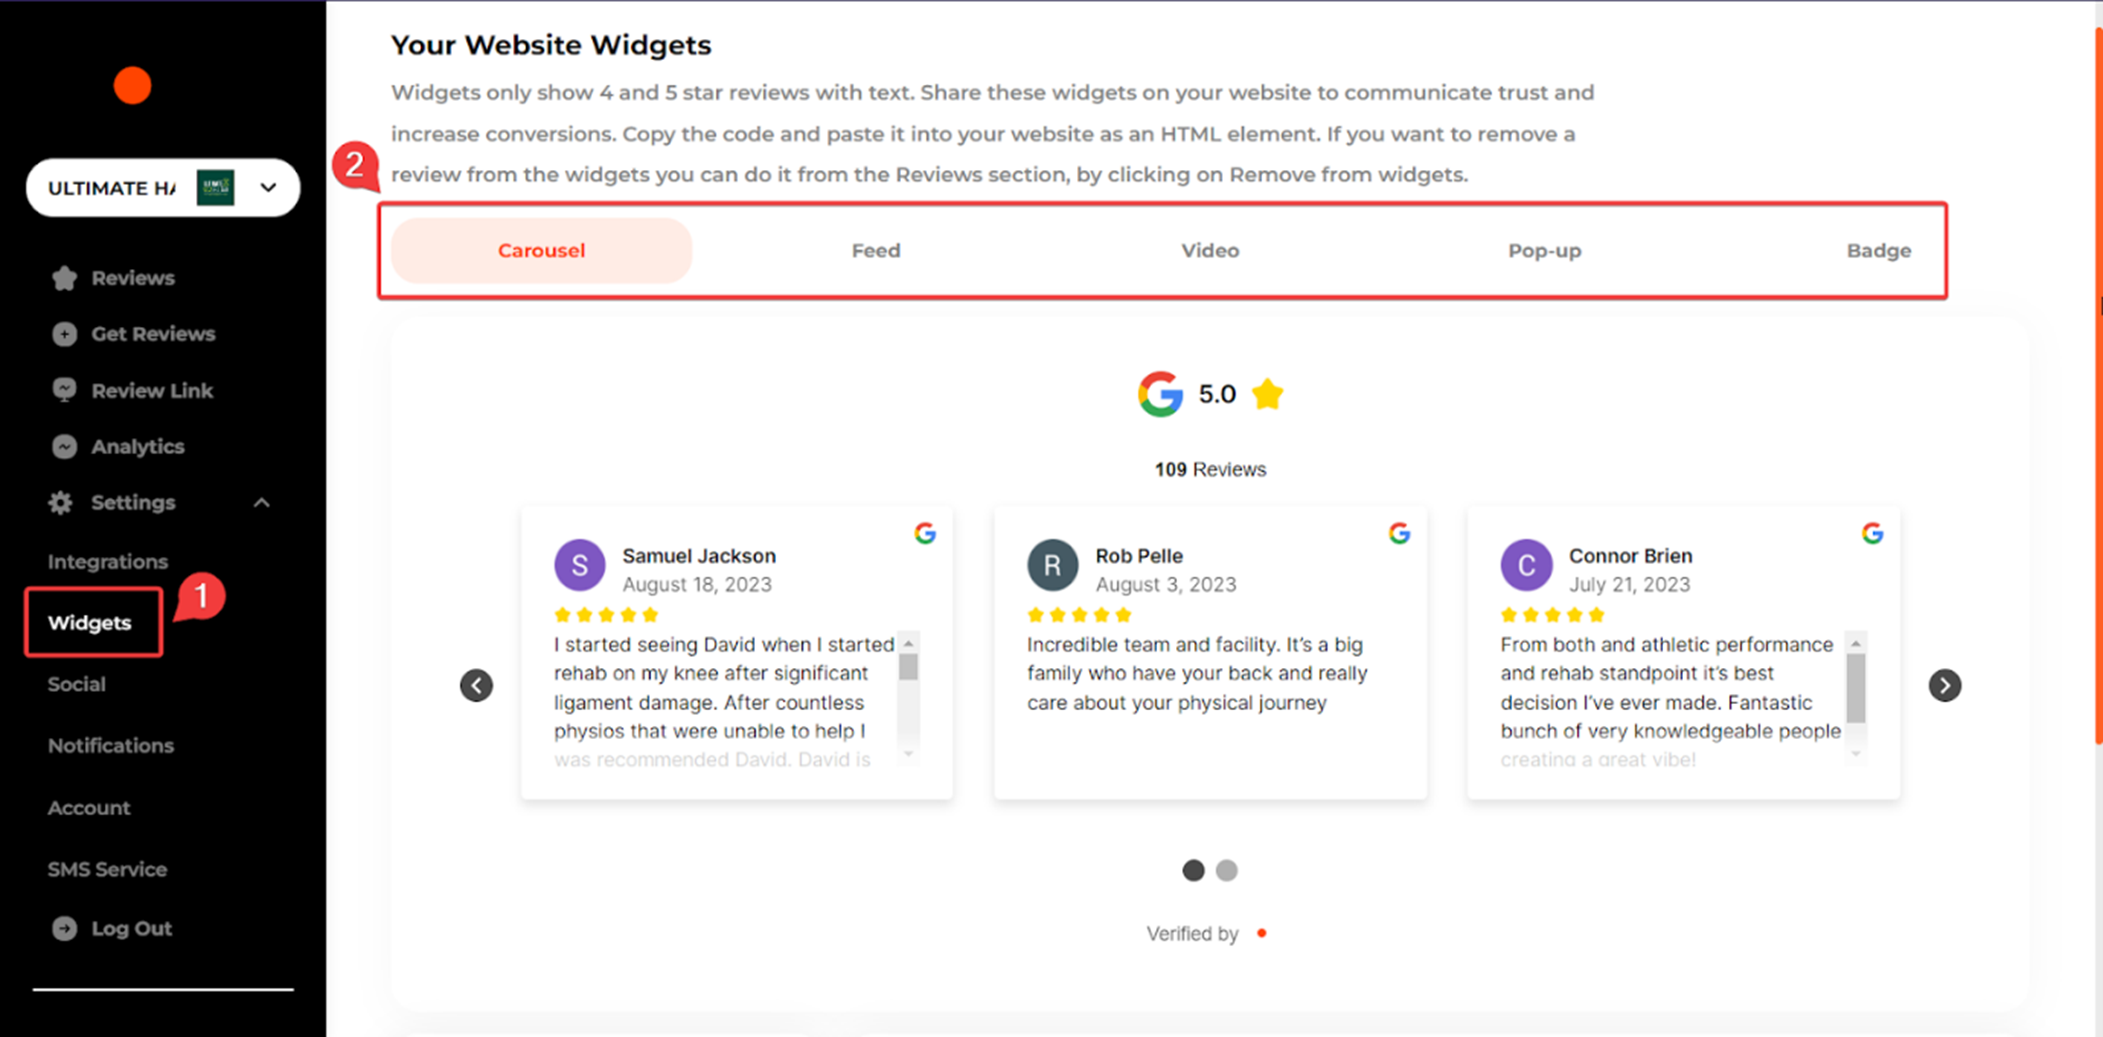
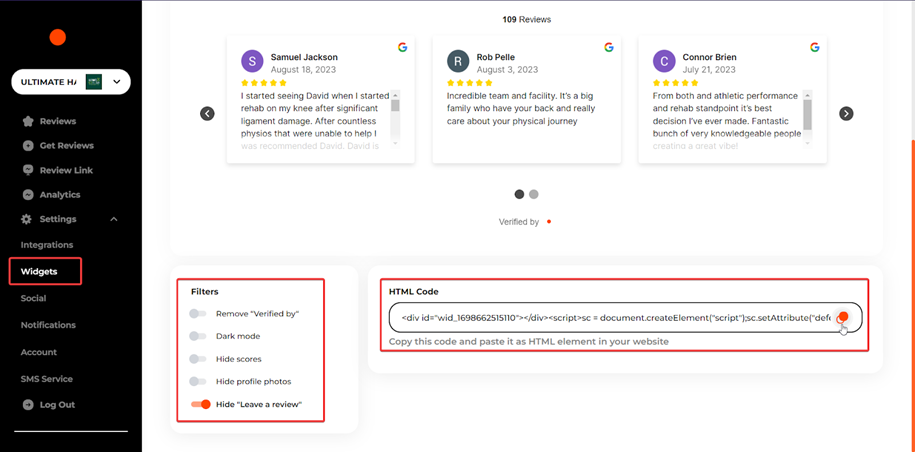
Website Widgets
We have five website widgets (Carousel, Feed, Video, Pop-up, Badge) showcasing 4 and 5-star reviews with text on the customer's website.
You can scroll down and further customize website widgets using different filters:
Remove “Verified By” on the website widget, use Dark mode, Hide scores of the integrated review platforms, Hide profile photos of the reviewers, and Hide “leave a review” on the website widget.
After choosing your favorite website widget type with customization, copy the HTML code and paste it on your website.
Social Sharing
The social sharing feature lets you connect your Facebook/Instagram accounts and customize the post template.
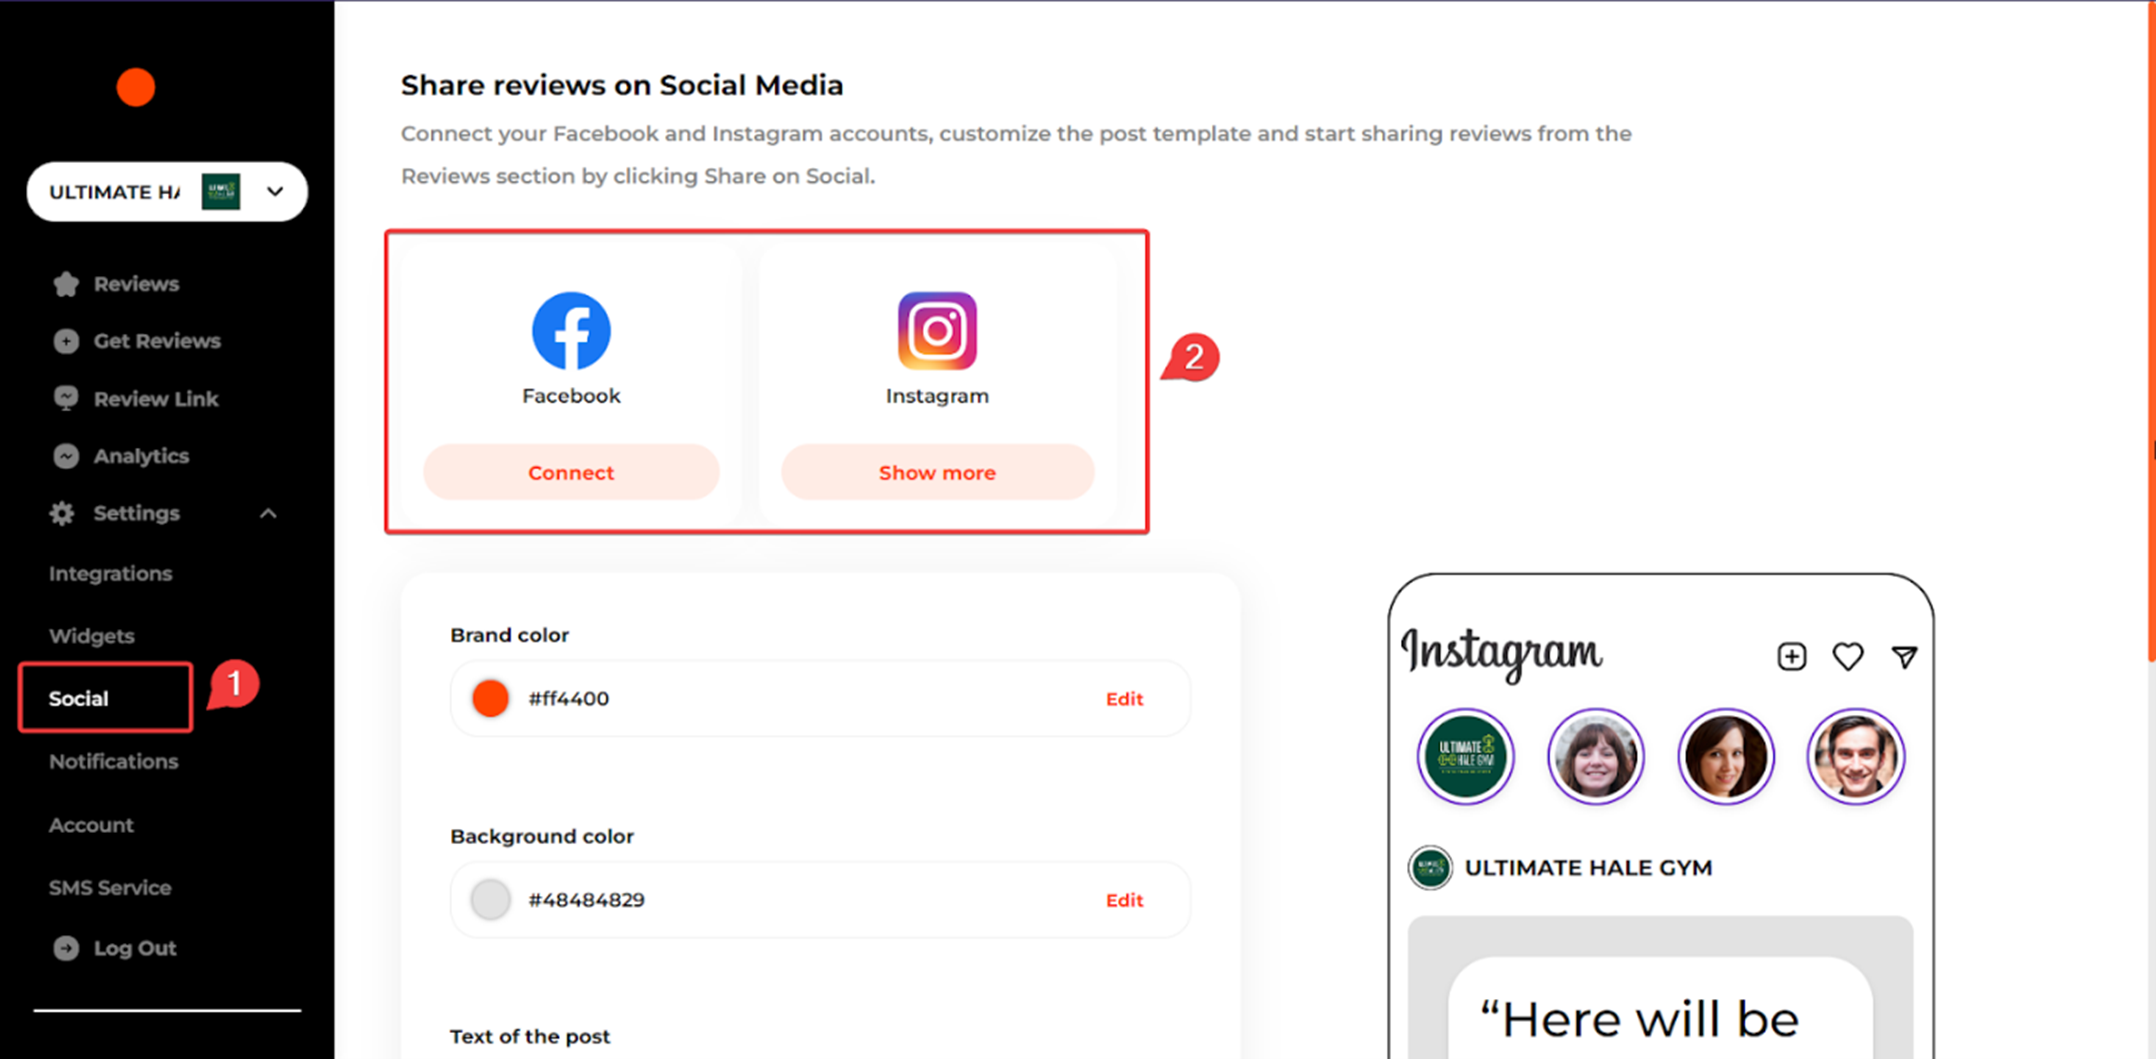
Now, start sharing reviews by clicking Share on Social under each review.
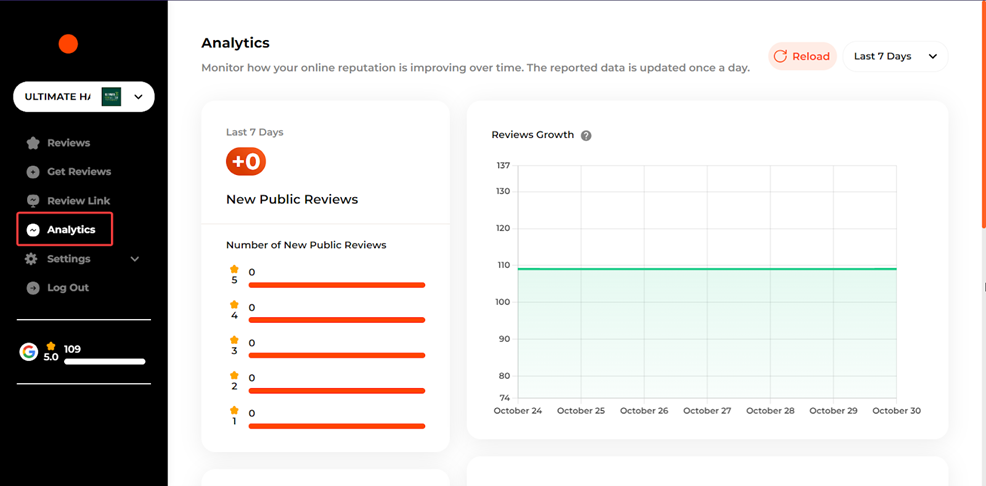
Analytics
The Analytics section allows you to visualize your growth with charts populated with data updated once a day.
The Analytics section shows the Number of New Public Reviews, the Reviews Growth chart represents the number of reviews over time, and the Average Rating Growth represents the average of the reviews over time, normalized on a scale from 1 to 5.
Reviews Funnel consists of:
- Invites Sent: Total email, SMS and WhatsApp campaigns sent in the selected time frame.
- Total Visits: The total number of visits to your Review Link in the chosen time frame.
- QR Code Visits: the total number of visits to the Review Link from the QR code in the selected time frame.
- New Public Reviews: reviews on public platforms (e.g. Google) in the selected time frame. Video reviews and private reviews are excluded.
- Negative Feedback: private reviews resulting from negative customer experiences in the selected time frame.
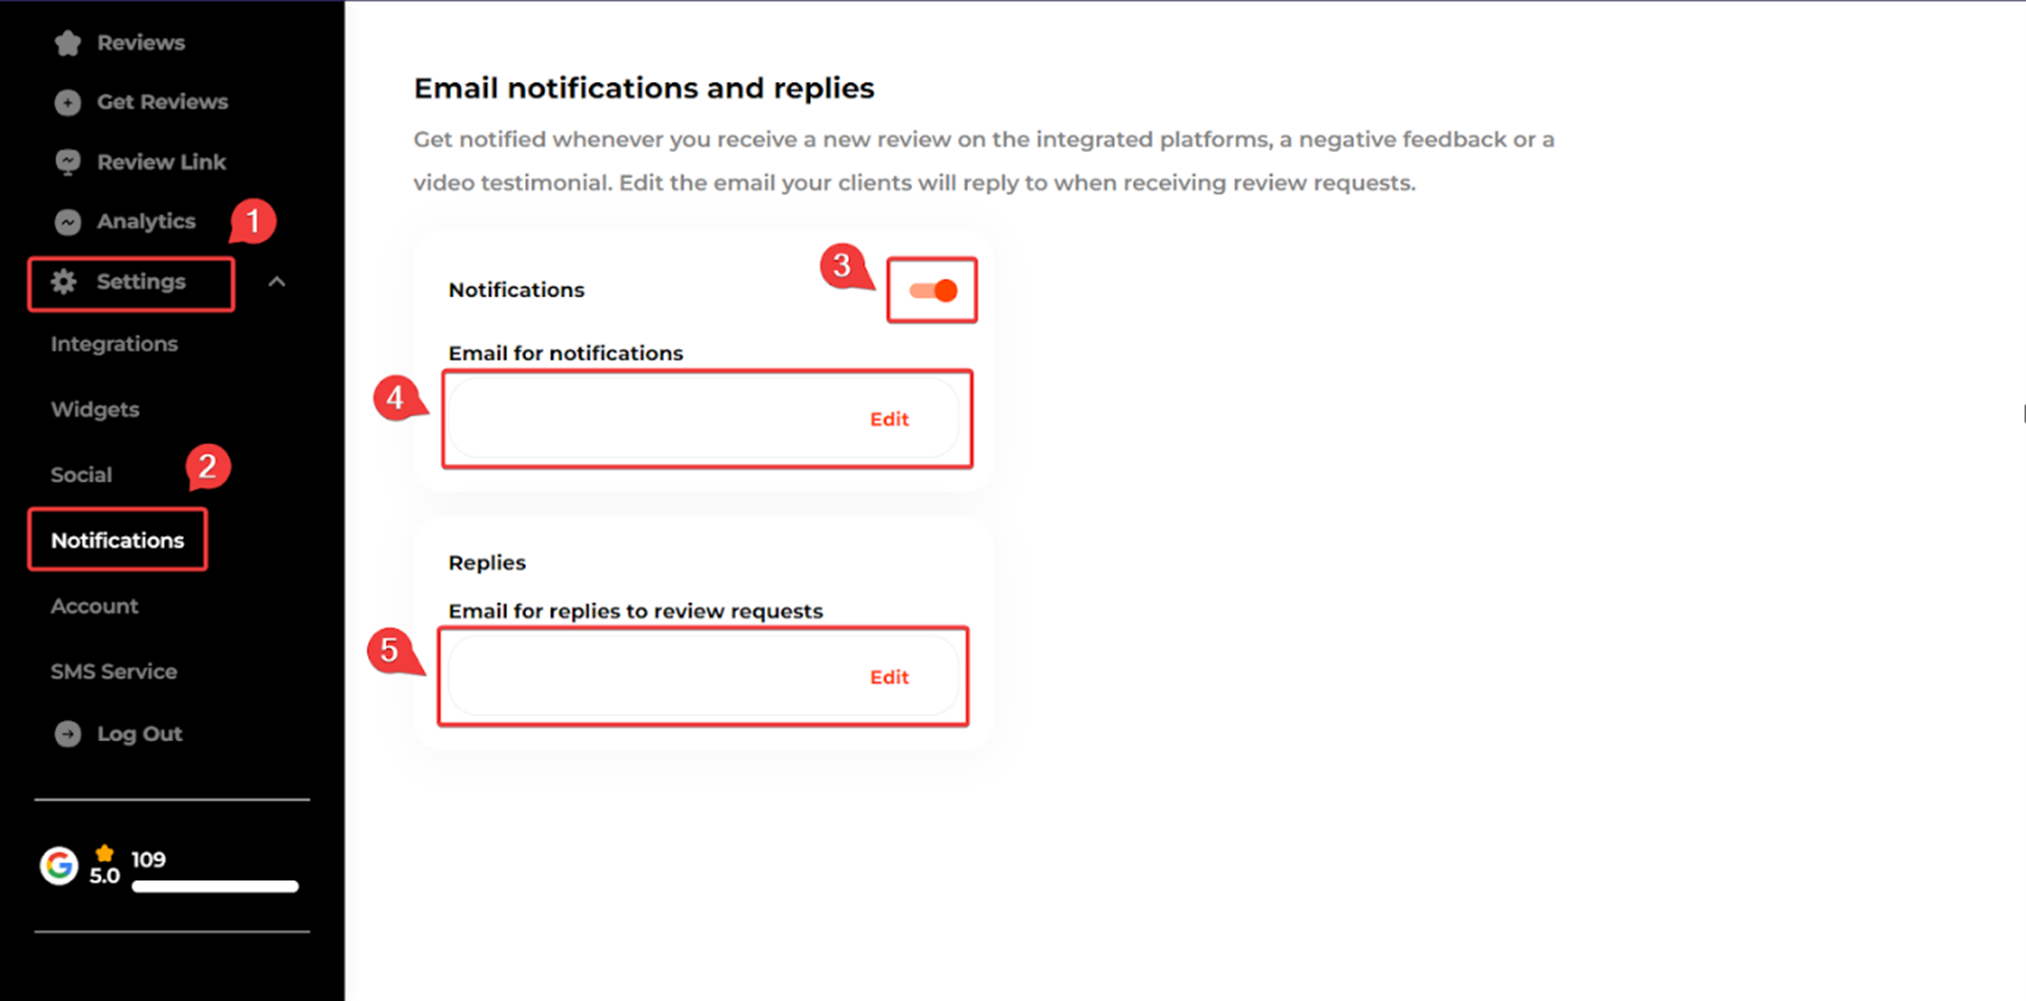
Notifications
To receive email notifications for new reviews, please go to Settings, then click Notifications.
Make sure the Notifications toggle is on. Then, enter your email in the following fields: Email for notifications and Email for replies to review requests.
SMS Service
SMS Service lets you connect with your messaging provider to send SMS review requests. If you are sending SMS to United States numbers, your connected phone must have an approved 10DLC or toll-free campaign.
To access the SMS service, click Settings → SMS Service.
Set up Twilio by entering Account SID and Auth Token. Once you’re done, click Save to save changes.
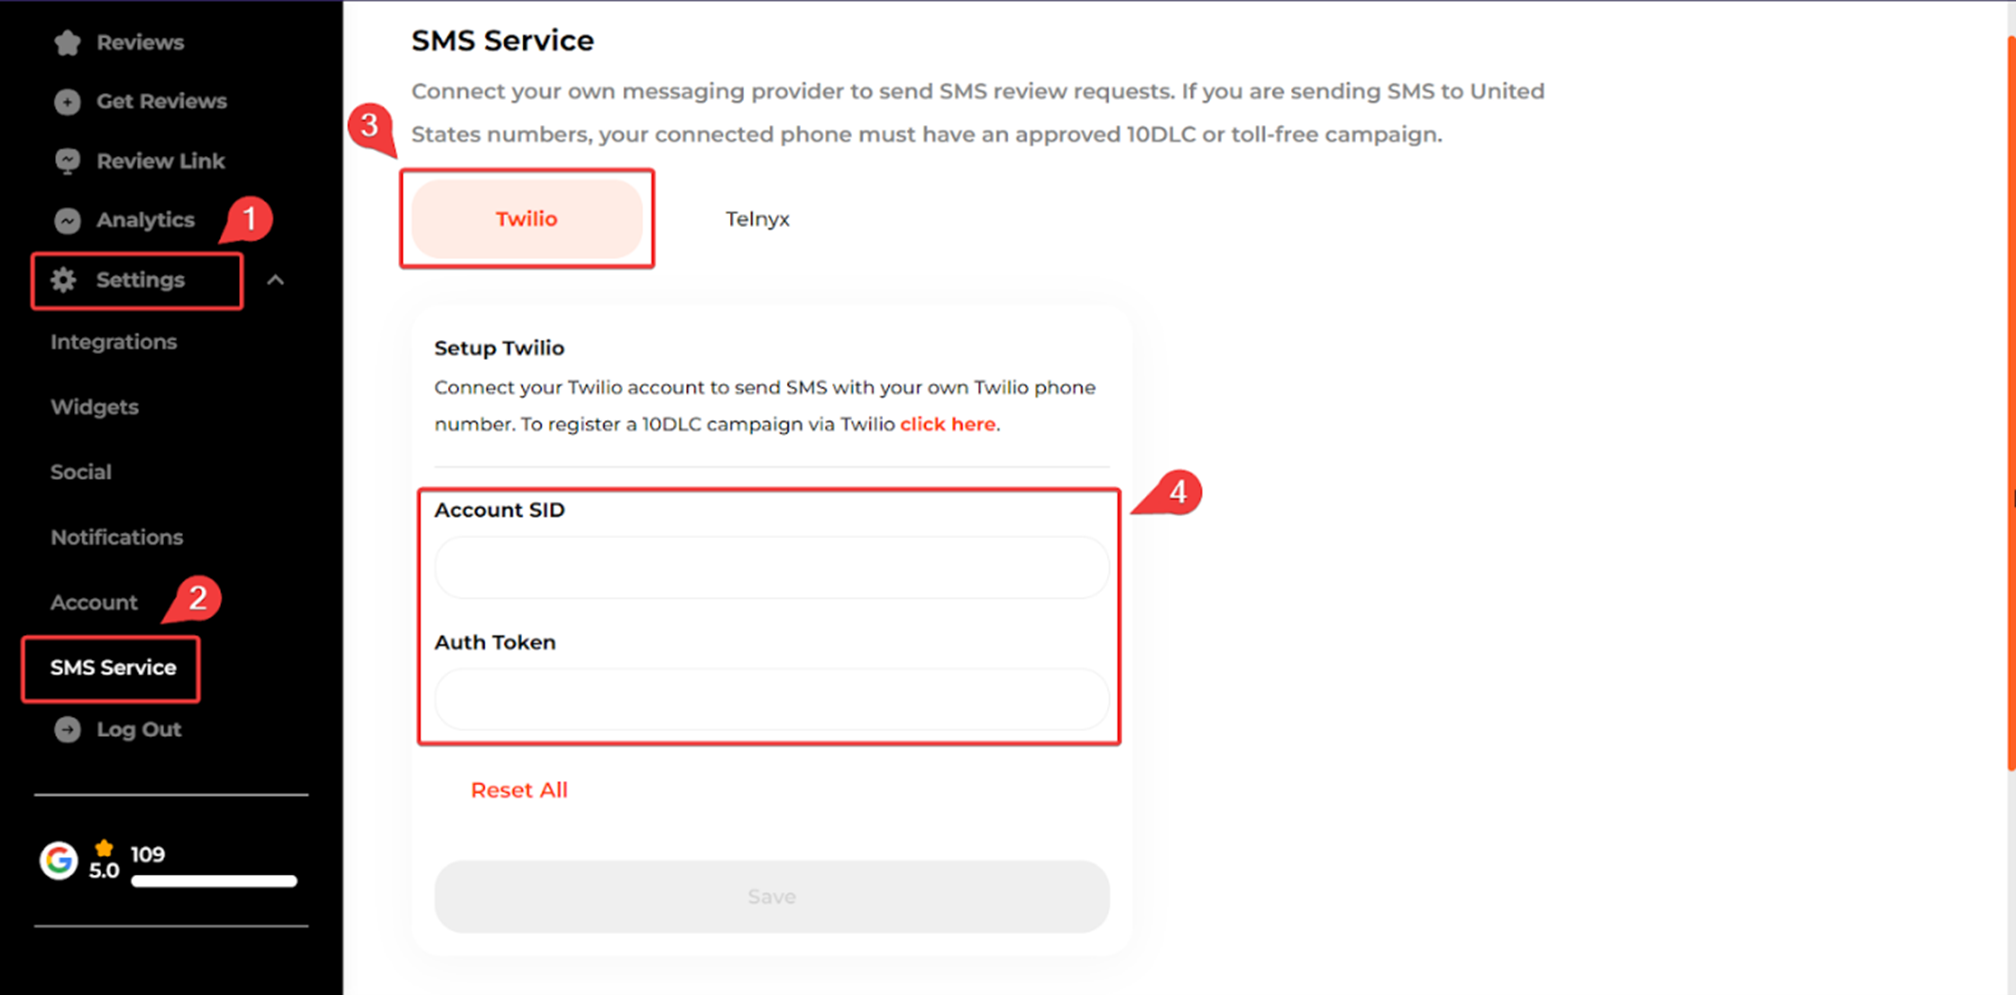
You can also set up Telnyx by entering the Api Key and click Save.
